10 Steps to Sew Leather on a Machine
To sew leather on a machine, start by choosing a heavy-duty sewing machine with adjustable settings designed for leatherwork. Pick smooth, manageable leather and use sharp leather needles paired with strong nylon or polyester thread for durability.
Prepare your pieces by cutting precisely and marking stitching lines clearly. Test your stitch length and tension on scrap leather before beginning your project. Sew slowly, maintaining steady pressure to ensure even stitches.
Finish by securing thread ends to prevent unraveling and ensure longevity. Follow these basics now, and you’ll soon master detailed techniques for flawless leather stitching.
Choose the Right Sewing Machine

Before you begin sewing leather, you need to choose the right sewing machine that can handle its thickness and toughness. Not all machines are built for leather, so pick one with a strong motor and adjustable presser foot pressure.
Choose a sewing machine with a strong motor and adjustable presser foot for sewing tough leather materials.
Heavy-duty or industrial machines are ideal because they can push needles through thick layers without jamming. Look for machines that support leather needles and have a walking foot mechanism to prevent the material from slipping.
You’ll want a machine that offers variable stitch length since leather requires longer stitches to avoid perforating and weakening the material. Avoid standard home machines designed only for fabric; they often lack the power and features needed.
Investing in the correct machine ensures smoother sewing and a professional finish on your leather projects.
Select Appropriate Leather Material

How do you choose the best leather for your sewing project? Start by considering the leather’s thickness and flexibility, as these affect how easily it feeds through your machine.
Next, think about the leather’s finish and texture. Smooth leathers glide better, while rough or heavily textured ones might require more effort.
Finally, match the leather type to your project’s purpose for durability and appearance.
- Thickness: Choose thinner leather (1-2 oz) for garments, thicker (3-4 oz) for bags or belts.
- Texture: Pick smooth or lightly grained leather for easier sewing; avoid overly rough surfaces.
- Type: Full-grain offers strength, while top-grain balances quality and workability.
Selecting the right leather sets you up for sewing success.
Gather Essential Sewing Tools

Choosing the right leather makes your sewing process smoother, but having the proper tools is just as important to get professional results. Start by gathering a heavy-duty sewing machine designed to handle thick materials like leather.
Use leather-specific needles; they’re stronger and prevent skipped stitches. Get polyester or nylon thread, which offers durability and flexibility.
Leather-specific needles and durable polyester or nylon thread ensure strong, flexible stitches without skips.
You’ll also need clips or leather pins, since regular pins can leave permanent holes. A sturdy rotary cutter or sharp scissors will help you cut clean edges.
Don’t forget a leather thimble to protect your fingers, and a seam roller to press seams flat without damaging the leather.
Having these tools ready guarantees your sewing goes smoothly and your finished piece looks polished and strong.
Prepare Leather Pieces for Sewing
Prepare Leather Pieces for Sewing
Although leather is durable, you’ll need to handle it carefully to make sure your pieces fit together perfectly. Proper preparation sets the stage for smooth sewing and professional results.
Start by cutting your leather pieces precisely using a sharp rotary cutter or heavy-duty scissors, following your pattern closely.
Next, mark your stitching lines with a non-permanent leather marker or chalk to guide your sewing.
Finally, consider skiving the edges where two pieces will overlap; thinning these areas prevents bulky seams and helps your project lie flat.
- Cut leather with precision tools for clean edges.
- Mark stitching lines clearly to maintain accuracy.
- Skive overlapping edges to reduce seam bulk.
These steps will help your leather pieces align perfectly and sew smoothly.
Use the Correct Needle and Thread
After preparing your leather pieces with accurate cuts and skived edges, selecting the right needle and thread becomes your next priority.
Use a leather needle designed with a sharp, wedge-shaped point to pierce through the tough material without causing damage.
Standard needles can create uneven holes or snag the leather.
For thread, choose a strong, durable option like bonded nylon or polyester. These threads resist abrasion and won’t easily break under tension.
Avoid cotton threads as they tend to weaken quickly.
Match the thread thickness to the leather’s weight. Thicker leather requires heavier thread for secure seams.
Adjust Machine Settings for Leather
When sewing leather, you’ll need to adjust your machine settings to handle its thickness and toughness properly. This ensures smooth stitching and prevents damage to both the leather and your machine.
Here are three key adjustments to make:
Here are three essential machine settings to adjust for smooth, damage-free leather stitching.
- Stitch Length: Increase the stitch length to about 3 to 4 mm. Short stitches can perforate and weaken leather, so longer stitches work better.
- Tension: Loosen the upper thread tension slightly to avoid puckering or tearing the leather surface.
- Presser Foot Pressure: Reduce the presser foot pressure to allow the leather to feed evenly without sticking or stretching.
Making these adjustments helps your machine glide over the leather, creating clean, durable seams without strain.
Practice on Scrap Leather
Why jump straight into your project when you can fine-tune your technique first? Practicing on scrap leather helps you get comfortable with stitching speed, tension, and needle pressure without risking your main piece.
Use scraps similar in thickness and texture to your project to simulate real conditions. Experiment with stitch length and seam allowances until you find the sweet spot.
Here’s a quick practice checklist:
| Task | Tip |
|---|---|
| Thread tension | Adjust until stitches lie flat |
| Stitch length | Test for durability & look |
| Needle pressure | Avoid leather puckering |
| Speed control | Practice steady sewing |
| Seam allowance | Mark and sew precisely |
Use this trial and error to build confidence and produce professional results on your actual leather project.
Pin or Clip Leather Pieces Securely
Once you’ve honed your stitching skills on scrap leather, it’s time to secure your pieces properly before sewing. Unlike fabric, leather can’t be pinned with traditional pins without leaving permanent holes. Instead, you’ll want to use clips or special leather pins designed for this purpose.
Before sewing leather, avoid traditional pins to prevent holes—use clips or specialized leather pins instead.
Here’s how to do it right:
- Use binder clips or leather sewing clips to hold pieces together firmly without damaging the material.
- If you must pin, opt for leather pins with blunt tips and insert them carefully along the seam allowance.
- Place clips or pins perpendicular to the edge to keep the leather aligned and easy to remove as you sew.
Securing the leather properly ensures your seams stay precise and your project looks professional.
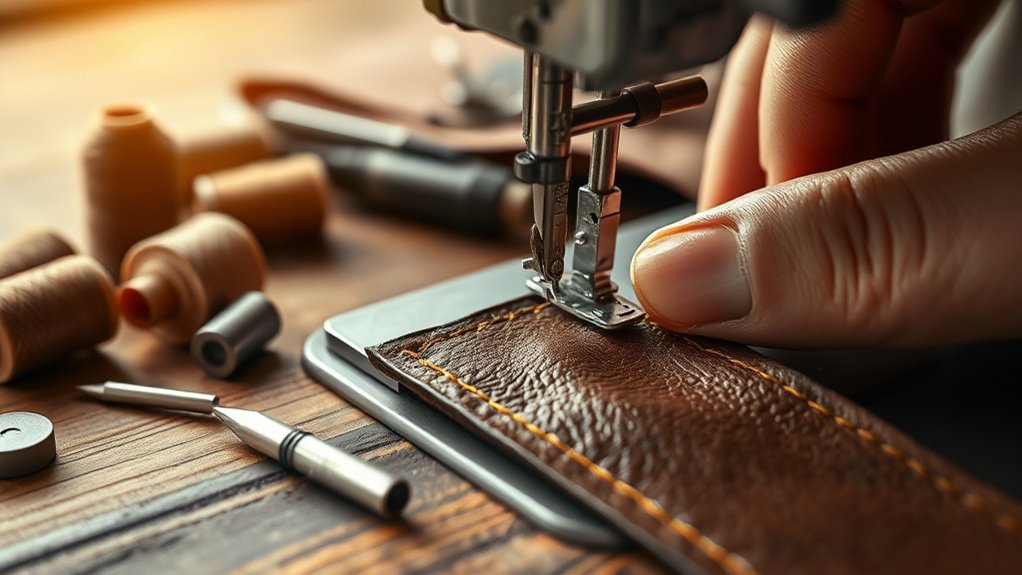
Sew Slowly and Steadily
Although sewing leather on a machine can feel challenging, you’ll get the best results by stitching slowly and steadily. Leather demands patience because rushing may cause skipped stitches or needle damage.
Keep your foot gently on the pedal, controlling the speed carefully. This steady pace helps the machine feed the leather evenly, preventing puckering or uneven seams.
Focus on guiding the material smoothly without pulling or pushing it, letting the feed dogs do their job. If your machine struggles, slow down even more or take short breaks.
Remember, consistent stitching not only improves the seam’s strength but also gives your project a professional finish.
Finish and Secure Your Stitches
As you near the end of your seam, make sure to finish and secure your stitches properly to prevent unraveling. This step is vital for durability and a clean finish.
Here’s how you can do it effectively:
- Backstitch: Sew backward over the last few stitches to lock them in place. This reinforces the seam’s end.
- Tie off: If your machine allows, stop stitching with the needle down, lift the presser foot, and pull the thread tails to tie a knot manually.
- Trim excess thread: Use sharp scissors to cut any long threads close to the leather without cutting the stitches.
Frequently Asked Questions
Can I Sew Leather Without a Walking Foot Attachment?
Yes, you can sew leather without a walking foot, but you’ll need to take it slow, use heavy-duty needles, and consider using a Teflon or leather presser foot to help feed the material evenly and prevent sticking.
Sewing leather requires patience and care to avoid needle breakage and uneven stitches. Using clips instead of pins can also help prevent holes in the leather.
Additionally, adjusting the stitch length to a longer setting can improve the overall quality of your seams on leather.
How Do I Prevent Leather From Stretching While Sewing?
You can prevent leather from stretching by using a leather needle, sewing slowly, and avoiding pulling the leather as you sew.
Also, stabilize the leather with masking tape or a backing fabric to keep it from shifting.
What Type of Seam Allowance Is Best for Leather Projects?
When Sarah crafted her leather wallet, she used a ¼-inch seam allowance for durability and neat edges.
You’ll want a ¼-inch seam allowance too, as it balances strength and flexibility perfectly for leather projects.
Can I Use Regular Sewing Machine Oil on Leather Machines?
You shouldn’t use regular sewing machine oil on leather machines because it may not suit their specific needs.
Instead, choose oil designed for leather machines to keep them running smoothly and prevent damage.
How Do I Repair Mistakes Made While Sewing Leather?
You can carefully remove stitches with a seam ripper designed for leather, then use a leather punch to create new stitch holes.
Always avoid ripping, and re-sew slowly to prevent further mistakes and damage to the leather.
Conclusion
Now that you’ve mastered sewing leather on your machine, you’re ready to stitch your creativity into reality. Like a painter with a brush, you hold the power to transform tough hides into stunning works of art. Take it slow, steady, and watch your seams come alive with every pass.
Remember, each stitch is a step closer to crafting something uniquely yours—strong, beautiful, and built to last. Keep sewing leather on a machine, and let your passion shine through! Your skills will help you create durable, stylish pieces that reflect your personal touch.