How to Make a Leather Knife Sheath: Step-by-Step DIY Guide
To make a leather knife sheath, start by choosing sturdy vegetable-tanned leather, which is ideal for durability and ease of crafting. Trace your knife’s outline onto the leather, adding a seam allowance for stitching.
Next, soften the leather by soaking it in water. This makes it easier to cut and shape. Carefully cut out the pieces following your traced lines.
Shape and mold the leather around the knife while it’s damp, then let it dry to hold its form.
Attach a belt loop using stitching or rivets for secure wear. Add fasteners to keep the knife safely in place, and finish by burnishing the edges for a polished, professional look.
Keep practicing, and you’ll master crafting a sheath that’s both durable and stylish.
Selecting and Preparing Leather

When selecting leather for your knife sheath, consider whether you want chrome-tanned leather, which is water-resistant and flexible, or vegetable-tanned leather, which you can color and preserve more easily. For durability and proper thickness, choose leather weighing between 6 to 9 ounces. This range ensures your sheath holds up well and fits your knife securely.
Before cutting, use a pattern made from cardstock or cardboard to trace the sheath’s shape accurately. To shape the leather, soak it in hot water until it darkens and bubbles slightly, then press it into form.
For cost-effective, eco-friendly options, source high-quality leather scraps from local shoemakers or upholsterers. Preparing your leather carefully establishes a strong foundation for crafting a durable, functional sheath.
Designing and Creating the Sheath Pattern

Before you start cutting your leather, decide how you’ll carry the sheath and how much of the handle should remain visible. Begin by sketching the knife outline on pattern paper, adding a 3/8-inch allowance for the welt.
Fold the pattern along its centerline to check coverage and how the belt loop fits, ensuring the sheath will sit comfortably on your belt. Once satisfied, transfer the pattern onto veg-tanned leather using a pencil or ballpoint pen, keeping symmetry and dimensions accurate.
Trace the knife shape onto the leather, leaving about ⅛ inch margin from the blade tip, and add a curved line around the handle for a snug fit. This careful design step sets you up for a perfect leather knife sheath.
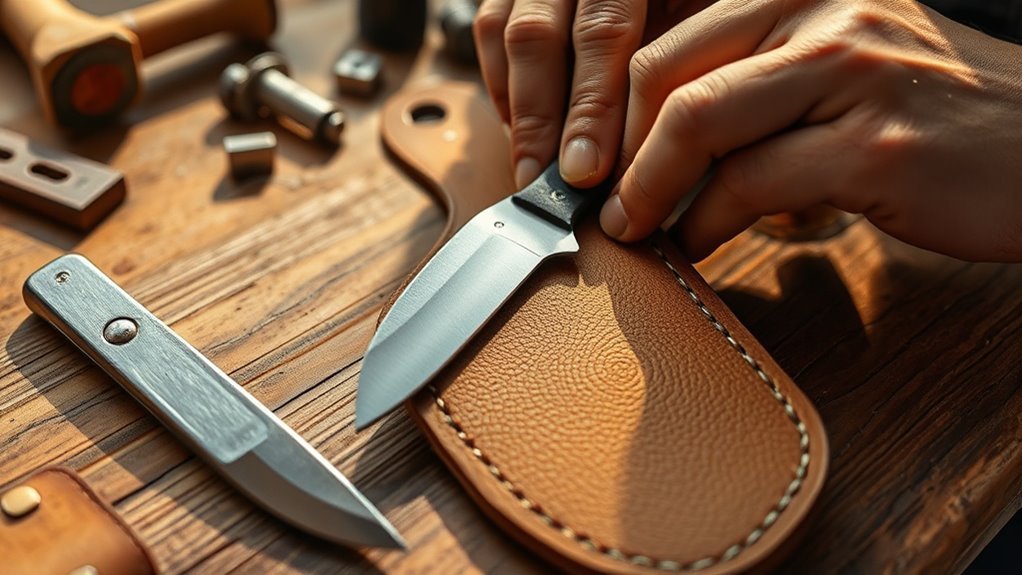
Cutting the Leather Pieces

Although cutting leather requires patience, using a sharp utility knife or X-Acto blade guarantees you follow your traced pattern lines with precision. Before you begin, briefly soak the leather in hot water until it changes color and bubbles slightly. This softens the material, making it easier to cut.
Place the leather on a soft, stable surface to prevent slips while you work. Carefully cut each layer—the main sheath piece, spacer, and welt—ensuring every piece fits your design perfectly.
For detailed or curved sections, consider using a rotary cutter or leather gouge to achieve smooth, clean edges. In leather work, the right knife to cut with and steady hands make all the difference in crafting a professional-looking sheath.
Forming and Molding the Leather
Start by soaking the leather in hot water until it’s soft and pliable. Then, shape it carefully around your knife or mold, using a cloth underneath to protect the surface.
Let the leather dry completely in that form before trimming and finishing the edges.
Wetting and Softening
When you soak the leather in hot water, it softens and changes color, signaling it’s ready to be shaped. This wetting and softening process makes the leather flexible, allowing you to mold it easily around your knife or template.
To get the best results, follow these steps:
- Soak the leather in hot water for a few minutes until it changes color, indicating full saturation.
- Remove excess water with a towel and let the leather cool slightly to avoid over-saturation.
- Press and form the damp leather over your knife or pattern, using a soft cloth to ensure even shaping.
Shaping and Drying
Once the leather is damp but firm, you can shape it by pressing and molding it around your knife or pattern on a flat, padded surface. Lay the damp leather on a soft mat or granite block, then carefully fold and press it to match the knife’s contours.
Use your hands or shaping tools to smooth the leather, guaranteeing a snug fit without overstretching. This step is vital to forming the sheath’s final shape. After molding, let the leather air dry completely.
This drying process sets the form permanently and can take 24 to 48 hours depending on the leather’s thickness and the humidity. Avoid rushing this step. Proper drying ensures your sheath holds its shape and remains durable over time.
Creating and Attaching the Belt Loop
How do you guarantee your leather knife sheath stays securely on your belt? By creating and attaching a strong belt loop. Start by folding a leather strip to form the belt loop, trimming it to your desired width and length. Position the loop just below the sheath’s top edge for a comfortable carry.
Follow these steps:
- Punch holes at each end of the loop and corresponding spots on the sheath.
- Use stitching or riveting to securely attach the loop, ensuring durability.
- Trim any excess leather from the strap end. Finally, slide the belt loop onto your belt to test the fit. Proper stitching and placement keep your sheath firmly in place during use.
Preparing for Stitching
Before you start stitching, score a shallow groove along the seam to guide your thread and keep stitches secure. Punch evenly spaced holes around the edges to make sewing easier and more durable.
Then, thread a sturdy needle with doubled waxed thread to guarantee strong, consistent stitches.
Scoring Stitching Guidelines
Although stitching can be challenging, scoring your leather properly sets a strong foundation for clean, even seams. Start by using a stitching groover or overstitcher to carve a shallow, consistent groove along the edge where you’ll sew. This guides your stitches and keeps thread protected.
Next, mark stitching holes at six per inch along this groove using a pricking iron or rowel tool to ensure precise, evenly spaced holes.
Finally, punch through both leather layers at each mark carefully to avoid tearing and maintain alignment.
Follow these steps for neat, professional results:
- Groove edges with a stitching groover.
- Mark holes evenly using a pricking iron.
- Pre-punch holes through all layers with consistent depth.
This preparation makes stitching easier and improves your sheath’s durability.
Threading and Securing
Where do you start once your leather edges are prepped with evenly spaced holes? Begin by threading a sturdy needle with waxed nylon or sinew. Pass the thread crossover inside each punched hole to guarantee a firm hold.
If the holes feel tight, use pliers or needle nose tools to push the needle through, maintaining consistent tension. Keep the thread tight and even as you sew around the edges, which helps create a straight, professional seam.
When you reach the last hole, tie off the thread securely with a knot inside it. For extra durability, apply a small amount of leather glue or cement to the knot. This final step assures your stitching stays strong, securing your leather sheath perfectly for long-term use.
Stitching the Sheath Together
Once you’ve prepared the leather pieces, you’ll punch evenly spaced holes along the edge using a stitching chisel or awl, aiming for 6 to 8 stitches per inch to guarantee durability. Thread a needle with waxed linen or nylon thread, doubling the length for easier handling.
Start stitching by passing the needle through the first hole from the inside to hide the knot. Use a saddle stitch method for a strong, even seam. Keep your stitches tight and uniform, using pliers if needed to push through thick leather.
Finally, secure the thread ends inside the sheath with a knot or backstitch and add a drop of glue to prevent unraveling. Remember:
- Punch consistent holes
- Use saddle stitch technique
- Secure thread firmly inside sheath

Finishing Edges and Dyeing
To give your knife sheath a polished, professional look, you’ll want to focus on finishing the edges carefully. Start by applying dye along the edges, letting it soak in for rich color.
Then, wet the leather and burnish edges using a hard tool, either by hand or with a drill press, to create a smooth, shiny finish. Finally, seal the edges with edge coat or beeswax to protect them.
Here’s a quick guide:
| Step | Tool/Material | Purpose |
|---|---|---|
| Dye edges | Leather dye/marker | Adds color and depth |
| Burnish edges | Wooden/metal tool | Smooths and polishes edges |
| Seal edges | Edge coat/beeswax | Protects and maintains finish |
This process ensures your sheath looks sleek and lasts longer.
Adding Fasteners and Final Details
After finishing and sealing the edges, it’s time to add fasteners and final details that secure your sheath and enhance its functionality. Start by attaching snap fasteners: punch holes at the marked spots, apply glue, then press the male and female parts together firmly.
Next, create a belt loop by folding and trimming a leather strip, gluing or stitching it onto the sheath where desired. Finally, burnish all edges again after adding fasteners and loops to give your sheath a smooth, professional look.
Before wrapping up, test the sheath by inserting your knife to ensure the snap fasteners hold securely. If needed, make adjustments for a perfect fit. These steps complete your sheath’s durability and style.
Frequently Asked Questions
What Kind of Leather to Use for a Knife Sheath?
You should use 6-9 oz vegetable-tanned or chrome-tanned leather for your knife sheath. Vegetable-tanned leather offers durability and tooling ease, while chrome-tanned provides water resistance and flexibility.
Avoid overly thick leather for comfort and workability.
What Tools Do You Need to Make a Leather Sheath?
Like a knight preparing for battle, you’ll need leather punches, a rotary cutter or X-Acto knife, needles with waxed thread, burnishing tools, and leather glue. These essentials help you craft a sheath worthy of legend.
What Ounce of Leather for a Sheath?
You’ll want 7-8 oz. leather for your sheath; it’s durable yet flexible enough to work with easily. If you need extra toughness, go for 9 oz., but avoid heavier leather unless you want a stiff, bulky sheath.
What Is the Best Material to Make a Knife Sheath?
You’ll want to use high-quality vegetable-tanned leather, around 6-9 oz., to make the best knife sheath. It’s durable, flexible, and protects your blade quietly, aging beautifully with proper care and finishing.
Conclusion
Now that you’ve crafted your leather knife sheath, you’ve transformed raw materials into something both functional and personal. Like a well-forged blade, your sheath combines strength and beauty, ready to protect your knife on every adventure.
Remember, each stitch and cut reflects your care and skill. Keep practicing, and your craftsmanship will only sharpen with time, making every sheath you create a monument to your dedication and passion.
By mastering how to make a leather knife sheath, you not only protect your blade but also showcase your artistry and commitment to quality.