How to Leather Wrap a Knife Handle: Step-by-Step Guide
To leather wrap a knife handle effectively, start by cleaning and drying the handle thoroughly. This ensures the leather adheres properly and lasts longer. Use a strip of vegetable-tanned leather, soaking it first to soften the material for easier wrapping.
Next, apply a thin coat of weatherproof glue to the leather strip. Begin wrapping by tucking one end under the handle scales, maintaining tight and even tension with each overlapping turn. This technique helps create a secure and comfortable grip.
Secure the end by firmly tucking and gluing it in place. Finally, seal the leather wrap to protect it from moisture and to shrink it snugly around the handle. Continue reading to discover tips for a strong, lasting wrap and proper care.
Materials Needed for Leather Wrapping

To wrap a knife handle effectively, you’ll need veg tan leather about 3 to 4mm thick for durability and a good grip. Start with a leather strip cut to fit your knife handle’s length and shape.
Use 3 to 4mm thick veg tan leather, cut to fit your knife handle’s length and shape, for durability and grip.
Before you begin the handle wrapping, soak the leather strip in water to make it pliable. This water soak helps the leather mold tightly around the handle as it dries, ensuring a snug fit.
You’ll also want weatherproof PVA glue to apply during wrapping. It boosts adhesion and prevents slipping. To secure the leather strip initially, tuck its starting end underneath the handle scales or tang.
With these materials ready, you’ll have everything needed for a professional, long-lasting leather handle wrap.
Preparing the Knife Handle

Before wrapping your knife handle, make sure you clean it thoroughly to remove any dirt, oil, or debris that could prevent the leather from adhering properly. Start by wiping the handle with a damp cloth and mild cleaner, then let it dry completely.
Next, shape and bevel the leather strip to match the handle’s contours for a snug fit. Cut the leather to an appropriate length, long enough to wrap around the handle multiple times.
Apply a thin layer of weatherproof glue, such as PVA or leather adhesive, to either the handle or the leather strip to ensure the wrap stays secure. Finally, tuck the starting end of the leather underneath the first wrap or handle scales for a smooth, durable beginning point.
Selecting and Preparing Leather Strips

Choose veg tan leather about 3-4mm thick for the best balance of durability and flexibility. Cut and shape the strips to fit your handle’s contours snugly.
Before wrapping, soak the leather for 15-30 minutes to make it easier to work with.
Leather Thickness and Type
Although selecting the right leather might seem straightforward, using veg-tan leather around 3-4mm thick guarantees your knife handle wrap stays durable and fits snugly. Opt for high-quality full-grain leather, such as kangaroo lacing, to assure strength and longevity.
When preparing your leather strips, make certain they’re long enough to wrap securely around the handle multiple times. Before wrapping, soak the leather strips in water to increase pliability, allowing for a tighter, more form-fitting finish as the leather dries.
You’ll also want to bevel and shape the strips to follow the handle’s contours closely, giving your knife a smooth, professional look. Choosing the right thickness and type of leather is essential for a functional and attractive knife handle.
Cutting and Sizing Strips
Getting your leather strips just right starts with careful measuring and cutting. Choose vegetable-tanned leather about 3-4mm thick for the perfect balance of durability and flexibility.
Measure your knife handle’s circumference and add enough length to wrap around it 2-3 times, typically 12-18 inches. Mark consistent widths on the leather before cutting to ensure a neat, professional look.
After cutting, bevel the edges of your strips to prevent fraying and create a smooth grip. These properly sized and prepared leather strips will make your wrap snug and comfortable, enhancing both the handle’s appearance and functionality.
Taking the time to cut and size your leather correctly establishes a solid foundation for a flawless knife handle wrap.
Soaking and Conditioning Leather
Once you’ve cut your leather strips to size, soak them in warm water for 15 to 30 minutes to make them pliable and easier to wrap. Proper soaking softens the leather without making it overly saturated, which can cause tearing or stretching.
After soaking, gently squeeze out excess water and let the leather rest for a few minutes to reach ideal flexibility. Once wrapped, apply a light coat of leather conditioner or oil to enhance durability and prevent cracking.
Keep these tips in mind:
- Use veg tan leather about 3-4mm thick for durability and ease of shaping
- Avoid soaking too long to prevent weakening the leather
- Condition leather after wrapping to maintain its strength and appearance
Soaking and conditioning leather properly ensures a secure, long-lasting knife handle wrap.

Applying Adhesive for Secure Wrapping
Before you start wrapping, choose the right adhesive. Weatherproof PVA glue works well for durability. Apply it evenly with a small brush, focusing on areas where the leather overlaps or bends to prevent slipping.
Make sure to let the glue dry completely, ideally overnight, to guarantee a strong, lasting bond.
Types of Adhesives
How do you guarantee your leather-wrapped knife handle stays secure and durable? Choosing the right adhesive is key. Use weatherproof PVA glue, a flexible and waterproof adhesive that bonds leather firmly to the handle.
For extra strength, mix a bit of Mop N Glo with PVA glue to boost durability and slip resistance. Apply a thin layer of this mixture to both the leather strip and handle surface before wrapping.
Here’s what you should keep in mind:
- Use weatherproof PVA glue for flexibility and water resistance.
- Mix Mop N Glo with PVA glue for enhanced adhesion.
- Tuck glued ends under the wrap to prevent slippage and ensure neatness.
Let the glue dry completely to maximize longevity.
Application Techniques
Securing your leather wrap starts with applying adhesive correctly. Begin by spreading a thin, even coat of weatherproof PVA glue over the knife handle using a brush or applicator. This ensures strong adhesion without excess glue, which can cause slipping.
As you wrap, tuck the leather firmly into the glued areas to maintain a tight bond. Don’t forget to reapply small amounts of glue at critical points like the start and end of the wrap for added security. This careful application creates a durable connection that will hold up under use.
While you want the adhesive to cure fully for maximum strength, avoid disrupting the wrap during this process to maintain the integrity of the bond. Proper application sets the foundation for a reliable, long-lasting leather handle.
Drying and Curing
Once you’ve finished wrapping the leather around the handle, you’ll want to make certain it dries completely to achieve a strong, lasting bond. Proper drying and curing are essential for a secure, weatherproof finish.
Apply a thin layer of weatherproof PVA glue before wrapping and tuck the leather ends securely. After wrapping, allow the handle to dry in a well-ventilated area for about 24 hours. This curing time ensures maximum adhesion and durability.
To ensure the best results, remember to:
- Let the glued leather dry fully without disturbance
- Tuck and secure all loose ends with additional glue or wraps
- Apply a weatherproof sealant after curing to protect against moisture and wear
Following these steps guarantees a tough, weatherproof leather handle.
Techniques for Starting the Leather Wrap
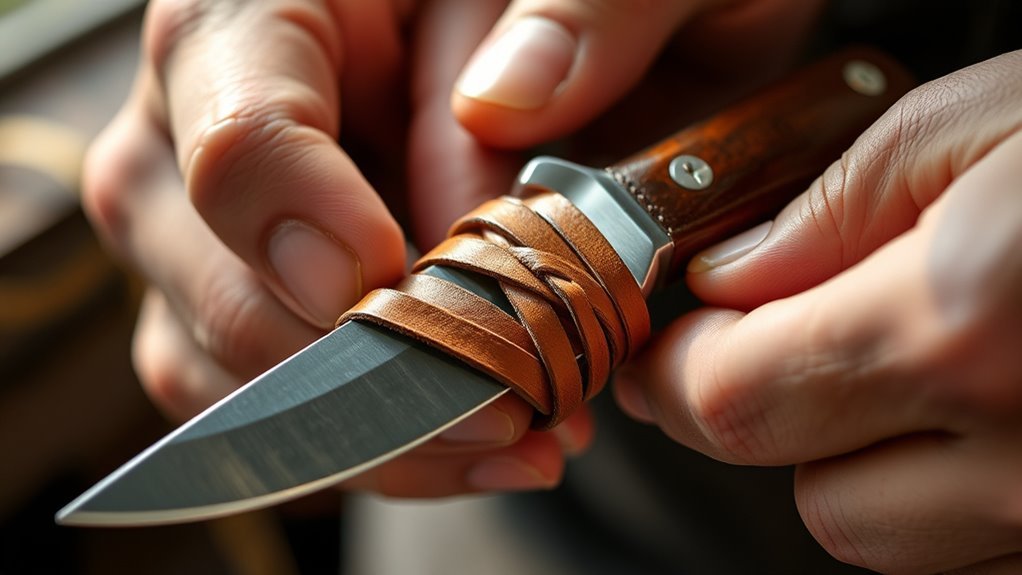
When you start wrapping leather around a knife handle, shaping and beveling the leather to fit snugly is essential. Tuck the leather’s start under the scales or tang to secure it firmly. Apply a small amount of weatherproof PVA glue at this point to hold the leather during wrapping.
Begin wrapping tightly from the bottom, keeping consistent tension to avoid slack. Use your fingers or a tool to press the leather firmly against the handle as you wrap upward, ensuring a smooth, secure start.
| Feeling | Action | Result |
|---|---|---|
| Confident | Shape leather | Snug fit |
| Focused | Secure start | Lasting wrap |
| Satisfied | Tight wrap | Comfortable grip |
Methods for Wrapping the Handle
After shaping and securing the leather start, you’ll want to soak the strip in water to make it more flexible for wrapping. This step helps the leather conform tightly to the handle’s shape. When you begin wrapping, start at the base of the handle, keeping each turn snug and slightly overlapping to ensure a solid grip.
You can also create a spiral pattern by twisting the leather as you wrap, maintaining steady tension. Here are three key methods for wrapping the handle:
Wrap tightly from the base, overlapping each layer for security.
Twist the leather strip for a spiral design with consistent tension.
Tuck the leather end under previous wraps or use glue to keep it in place.
These techniques provide a durable, comfortable leather wrap for your knife handle.
Securing the Leather End
Although wrapping the handle tightly is important, securing the leather end properly guarantees your work stays intact. To secure the leather end, tuck the final wraps under the previous layer, preventing slipping and creating a neat finish.
Slightly wet the leather before tucking to help it shrink and tighten as it dries. Wrap the leather tightly around the handle with 3-4 overlapping turns to lock it securely.
For extra hold, apply PVA glue or adhesive on the end wrap. Finally, press down firmly and let the leather dry completely to ensure maximum security.
| Step | Action |
|---|---|
| 1 | Wrap leather tightly around handle |
| 2 | Make 3-4 overlapping turns |
| 3 | Slightly wet leather before tucking |
| 4 | Tuck end under previous layer |
| 5 | Apply glue and press firmly |
Finishing Treatments for Durability
To guarantee your leather-wrapped knife handle stands up to regular use, you’ll want to apply finishing treatments that boost durability and water resistance. Start by coating the leather with a thinned PVA glue or a specialized sealant to enhance adhesion and prevent moisture from seeping in.
After sealing, thoroughly dry the handle so the leather shrinks tightly around it, minimizing any movement. Using gentle heat can help set the sealant, further improving durability.
For lasting waterproofing and protection, consider these key steps:
- Apply a weatherproof PVA or a Mop N Glo mixture before sealing
- Use heat to enhance sealant adhesion and wear resistance
- Ensure thorough drying between treatments to lock in waterproofing These finishing touches protect your wrap and extend its lifespan.
Maintenance and Care of Leather Wrapped Handles
Sealing and finishing your leather-wrapped knife handle set the stage for long-lasting use, but proper maintenance keeps it looking and performing its best. For cleaning, use a damp cloth to gently wipe your leather handle. Never soak it, as excess moisture can cause damage.
Every few months, apply a leather conditioner or mink oil to keep the leather supple and prevent cracking. Store your knife in a cool, ventilated area and avoid exposing the leather handle to extreme heat or direct sunlight, which can dry and fade it.
Regularly inspect the wrapping for looseness or fraying. If you notice any, re-tighten or repair it promptly to maintain durability. With consistent cleaning and conditioning, your leather handle will stay strong and attractive for years.
Frequently Asked Questions
How to Wrap a Handle in Leather?
You soak the leather to soften it, then start wrapping tightly around the handle, securing the beginning with glue or tucking it under. Keep even tension, spiral continuously, and finish by tucking or overlapping the end firmly.
What Kind of Leather to Use for a Knife Sheath?
Choose vegetable-tanned, full-grain leather for your knife sheath. It’s tough, ages beautifully, and molds perfectly.
Avoid chrome-tanned leather; it’s softer but won’t hold up. You want strength, durability, and a sheath that tells your story.
How to Braid Leather Handle Wrap?
You start by cutting three long leather strips, then anchor them at the handle’s base. Cross the right over the middle, left over the new middle, tighten each braid, and finish by securing the ends neatly.
What Is the Best Thing to Seal a Knife Handle With?
You’ll want to seal your knife handle with clear epoxy for strong, waterproof protection. For extra durability, follow up with a polyurethane topcoat. This combo keeps moisture out and preserves your leather wrap beautifully.
Conclusion
Now that you’ve mastered leather wrapping your knife handle, you’ve given it a grip so solid it could hold onto a greased pig in a hurricane!
Remember to keep your leather cared for with regular maintenance and finishing treatments to make certain it stays durable and comfortable.
With these simple steps, your knife won’t just look great—it’ll feel like an extension of your own hand every time you use it.
Keep wrapping and enjoy the craftsmanship of your leather wrapped knife handle!