How to Fix Scratches on Leather Car Seats Step by Step
First, examine the scratch carefully to see how deep it is. Cleaning and fixing scratches on leather car seats requires attention to detail to achieve the best results. Start by cleaning the area with a mild leather cleaner and let it dry.
Apply a leather conditioner to soften the seat. For minor scratches, use a leather repair kit to fill and color the damaged spot. For deeper scratches, gently sand and build up filler before coloring.
Blend the repair to match the surrounding leather, then condition for shine. Keep going to discover detailed tips on maintaining your seats and preventing future damage.
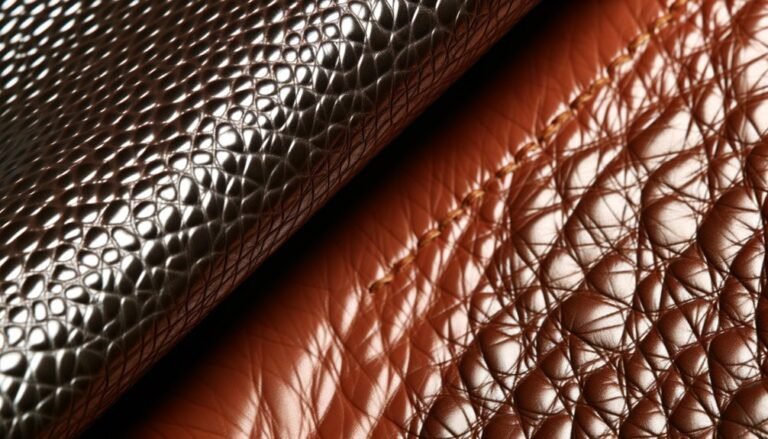
Assessing the Damage on Leather Car Seats

Before you begin repairing scratches on your leather car seats, you need to carefully assess the damage. Take a close look at the scratched area under good lighting. Determine if the scratch is superficial, only affecting the finish, or if it’s deep, cutting into the leather itself.
Run your fingers gently over the scratch to feel its depth and texture. Check for any peeling or cracking around the damaged spot. Also, note the size and shape of the scratch to decide the best repair method later.
Identifying whether the scratch is fresh or old helps too, as older damage might require more intensive treatment. This thorough assessment guarantees you approach the repair correctly and avoid causing further harm to your leather seats.
Gathering the Necessary Materials and Tools

Once you’ve assessed the damage on your leather seats, you’ll want to gather the right materials and tools to fix the scratches effectively. Start with a leather repair kit, which usually includes filler, color compounds, and applicators tailored for automotive leather.
You’ll also need fine-grit sandpaper or a leather sanding pad to smooth rough edges around the scratches. Have a soft microfiber cloth ready for applying products and wiping excess material. Leather conditioner is essential for restoring moisture after the repair.
Depending on the severity, you might want a small palette knife or spatula to apply filler precisely. Finally, verify you have good lighting and gloves to protect your hands. Having everything on hand before you begin will make the repair process smoother and more efficient.
Cleaning the Leather Surface Thoroughly

Although it might seem simple, cleaning your leather seats thoroughly is an essential step to guarantee the repair materials adhere properly and the finish looks seamless. Neglecting this can cause dirt and oils to prevent the filler or dye from bonding, ruining your efforts.
Follow these steps to clean your leather surface effectively:
- Vacuum the seat to remove loose dirt and crumbs, preventing further scratches.
- Use a soft cloth dampened with a mild leather cleaner to gently wipe the entire scratched area.
- Avoid harsh chemicals that might strip natural oils or discolor the leather.
- Let the leather air dry completely before moving on to repair.
Cleaning right sets the stage for a flawless, long-lasting fix.
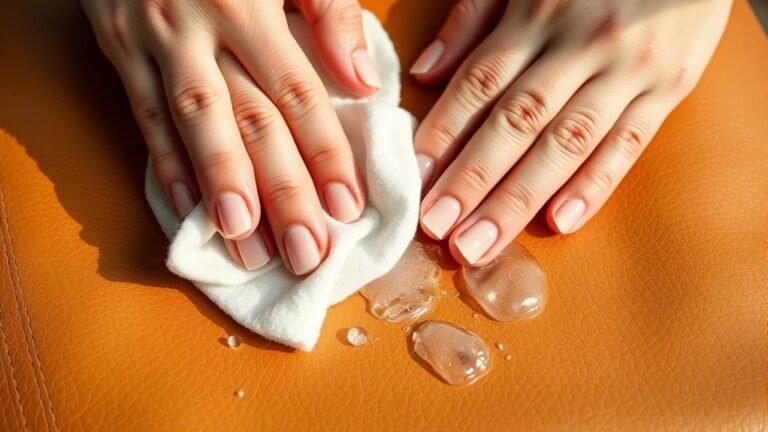
Applying Leather Conditioner to Soften the Material
After cleaning, your leather might feel a bit stiff or dry, which can make repairs harder to apply smoothly. To fix this, grab a high-quality leather conditioner and apply a small amount onto a soft, clean cloth. Gently rub the conditioner into the scratched area using circular motions.
This helps restore moisture, making the leather more flexible and less prone to cracking. Allow the conditioner to soak in for about 15 to 20 minutes. If needed, apply a second thin layer to ensure thorough absorption.
Conditioning not only softens the leather but also enhances its durability and appearance, preparing it perfectly for further repair steps. Remember, skipping this step might cause repair products to sit unevenly or peel off later.
Using Leather Repair Kits for Minor Scratches
When you notice minor scratches on your leather seats, using a leather repair kit can quickly restore their smooth appearance. These kits come with everything you need to fix small imperfections without professional help. Here’s how to get started:
1. Clean the area thoroughly
Remove dirt and oils to ensure the repair material bonds well.
Cleaning away dirt and oils helps the repair material adhere perfectly for a smooth, lasting finish.
2. Apply the repair compound
Use the provided spatula to fill in scratches gently.
3. Let it dry completely
Patience here means a stronger, less noticeable fix.
4. Use a colorant if included
Match your seat’s shade to blend the repair seamlessly.
With these steps, your seats will look refreshed, and you’ll feel proud of your DIY success.
Treating Deeper Scratches and Scuffs
If you’re dealing with deeper scratches and scuffs on your leather seats, simple repair kits might not be enough to restore their original look. You’ll need to fill the damaged areas with a leather filler or compound to rebuild the surface.
After cleaning and drying the area, apply the filler in thin layers, allowing each to dry before adding the next. Once smooth, gently sand the area before moving on to color touch-up.
| Step | Material Needed | Tips |
|---|---|---|
| Clean | Leather cleaner | Remove dirt and oils |
| Fill | Leather filler | Apply thin, even layers |
| Sand | Fine sandpaper | Smooth filler edges |
| Dry | Air or heat source | Ensure complete drying |
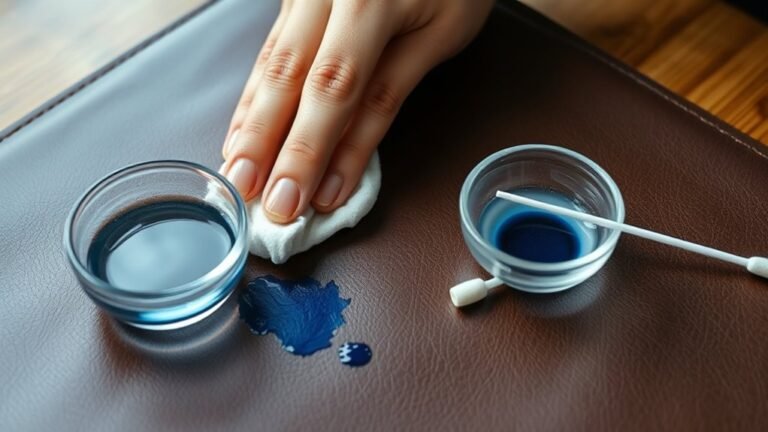
Blending Repairs to Match the Seat Color
Although repairing the surface is essential, blending the repaired area to match your seat’s original color truly brings the finish together.
To seamlessly blend your repair, follow these steps:
Seamlessly blend your leather repair by carefully matching color, layering dye, and finishing with conditioner for a flawless look.
- Choose a leather dye that matches your seat’s color exactly. Test it on a hidden spot first.
- Apply the dye in thin layers, allowing each to dry before adding more, to build a natural-looking tone.
- Use a sponge or soft cloth to gently blend the edges of the repaired patch with surrounding leather.
- Finish with a leather conditioner to restore shine and help the color settle evenly.
Maintaining Leather Seats to Prevent Future Damage
To keep your leather car seats looking their best and prevent new scratches, you need to establish a regular maintenance routine. Clean your seats weekly with a soft cloth and a leather cleaner designed specifically for automotive interiors. Avoid harsh chemicals that can dry out the leather.
After cleaning, apply a quality leather conditioner to keep the material supple and less prone to cracking or scratching. Protect your seats from direct sunlight by using sunshades or parking in shaded areas, as UV rays weaken leather fibers.
Also, be mindful of sharp objects like keys or tools when entering or exiting your car. By caring for your leather seats consistently, you’ll maintain their appearance, durability, and value over time.
Frequently Asked Questions
Can Scratches on Leather Seats Affect Car Resale Value?
Yes, scratches on leather seats can lower your car’s resale value since buyers often see them as signs of neglect.
Fixing them promptly helps maintain your car’s appearance and boosts its market appeal.
Are There Any DIY Methods Without Using a Repair Kit?
You can try DIY methods without a repair kit—70% of car owners successfully use household items like olive oil or vinegar to minimize scratches.
Just clean, apply gently, and buff; it’s simple but won’t fix deep damage.
How Long Does a Leather Repair Typically Last?
A leather repair typically lasts between one to five years, depending on the repair quality and how well you maintain your seats.
Regular cleaning and conditioning help extend the repair’s lifespan, keeping your leather looking fresh longer.
Can Pet Scratches on Leather Be Completely Removed?
You usually can’t completely remove pet scratches on leather, but you can substantially reduce their appearance.
Using specialized leather repair kits and conditioners, you’ll restore texture and color, making scratches much less noticeable over time.
Is Professional Leather Repair Worth the Cost?
Yes, professional leather repair is usually worth the cost because they restore your seats expertly, saving you time and preventing further damage.
You’ll get a flawless finish that DIY methods often can’t achieve.
Conclusion
By following these steps, you can easily restore your leather car seats and keep them looking new. For example, Sarah noticed a deep scratch from her keys but, after using a leather repair kit and conditioner, her seats looked flawless again.
Regular care not only fixes damage but also prevents future wear. With a little effort, you’ll extend your seats’ life and maintain your car’s interior value effortlessly.
Taking the time to fix scratches on leather car seats ensures a smooth, attractive finish. Proper maintenance and timely repairs are key to preserving the quality and appearance of your leather upholstery.