10 Steps to Clean Oil Stains From Leather
To clean oil stains from leather effectively, start by assessing the stain’s size and type. This initial step is crucial to determine the best cleaning approach for your leather item. Gently blot any excess oil without rubbing to avoid spreading the stain further.
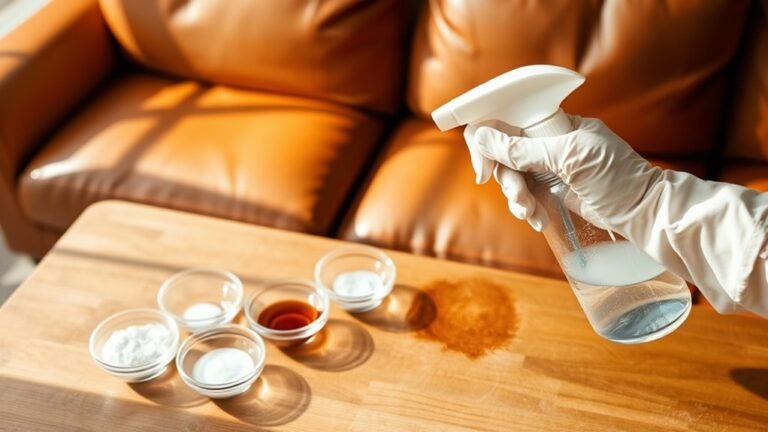
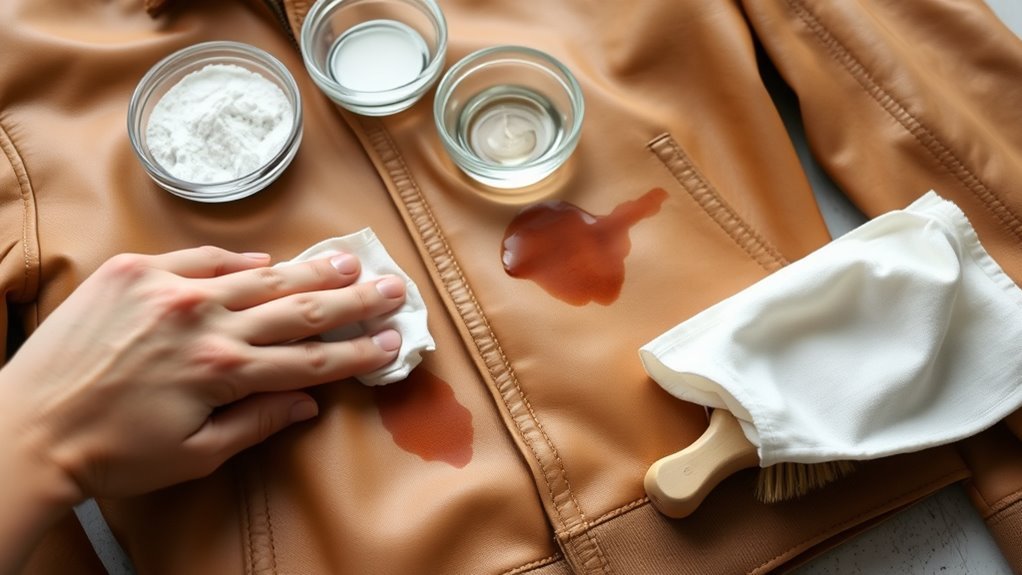
Next, sprinkle cornstarch or talcum powder over the affected area and let it absorb the oil overnight. The powder helps draw out the oil naturally, making it easier to remove.
Carefully brush off the powder the next day, then apply a suitable leather cleaner to the stained spot. Wipe the area with a damp cloth, condition the leather to restore its moisture, and let it air dry away from direct heat.
By keeping these steps in mind, you can protect and maintain your leather’s look effectively while ensuring oil stains are properly treated.
Assess the Type and Severity of the Oil Stain

Before you begin cleaning, you need to assess the type and severity of the oil stain on your leather. Take a close look at the stain’s size, color, and how deeply it has penetrated the leather.
Fresh oil stains usually appear shiny or wet. Older stains might look dark and set. If the stain is small and recent, it will be easier to remove.
Fresh oil stains appear shiny and wet, while older ones look dark and set. Small, recent stains are easier to remove.
Larger or older stains might require more intensive care.
You should also consider the type of oil. Vegetable oils, motor oils, and lotions can react differently with leather. Knowing these details helps you choose the right cleaning method and prevents damage.
Taking this moment to evaluate ensures you don’t make the stain worse or harm your leather item.
Blot Excess Oil Gently Without Rubbing

Once you’ve identified the stain’s nature and severity, the next step is to carefully remove any excess oil. Use a clean, soft cloth or paper towel to blot the stain gently. Don’t rub, as this can push oil deeper into the leather fibers.
Blotting absorbs surface oil without spreading it, preserving the leather’s texture and color.
| Step | Action | Reason |
|---|---|---|
| 1 | Use a soft cloth | Prevents scratches |
| 2 | Blot gently | Absorbs excess oil |
| 3 | Avoid rubbing | Stops stain from spreading |
| 4 | Work from edges inward | Minimizes stain size |
| 5 | Replace cloth as needed | Ensures continuous absorption |
Follow these steps carefully for best results.
Sprinkle Cornstarch or Talcum Powder on the Stain

Although the oil is still fresh, you can sprinkle cornstarch or talcum powder directly onto the stain to help absorb the remaining grease. This simple step can make a big difference in preventing the oil from setting deeper into the leather.
Here’s why it works and how to do it effectively:
Understanding why it works helps you apply it correctly for the best stain removal results.
- Absorption Power: Both powders draw out oil, reducing its visibility.
- Gentle on Leather: They won’t damage the material or alter its texture.
- Easy Application: Just sprinkle enough to cover the stain completely.
- Prepares for Next Steps: It sets you up for easier removal when you clean the powder off later.
Let the Powder Absorb Oil Overnight
After sprinkling cornstarch or talcum powder on the oil stain, let it sit overnight to give the powder enough time to soak up the grease. This waiting period is essential because the powder needs several hours to draw the oil from the leather’s surface and deeper layers.
Avoid disturbing the powder during this time, as any movement can reduce its effectiveness. By leaving it undisturbed, you allow the powder to fully absorb the oil, making it easier to remove later without spreading the stain.
Patience here will pay off, as rushing the process can cause the oil to set permanently. When you wake up, the powder should feel slightly clumped or heavier, indicating it has absorbed the oil successfully.
Brush Off the Powder Carefully
Start by gently brushing off the powder with a soft brush or cloth. You want to remove it without grinding the oil deeper into the leather. Take your time and be patient. Rushing can damage the delicate surface.
Follow these steps to brush off the powder carefully:
- Use light strokes to avoid scratching the leather.
- Brush in one direction to lift the powder evenly.
- Avoid pressing too hard—let the brush do the work.
- Check your progress frequently to see if the powder is fully removed.
Apply a Leather Cleaner Suitable for Oil Stains
Once you’ve carefully removed the powder, it’s time to tackle the oil stain directly with a leather cleaner designed for oil-based marks. Choose a product labeled safe for leather and effective against oil stains.
Before applying, test it on a hidden area to guarantee it won’t discolor or damage the leather.
Apply a small amount of cleaner to the stained spot. Don’t saturate the leather.
Use just enough to break down the oil without soaking the material.
Let the cleaner sit for the time recommended by the manufacturer, usually a few minutes. This allows the formula to penetrate and lift the oil from the leather fibers.
Avoid rushing this step, as proper application is essential for removing the stain without harming your leather item.
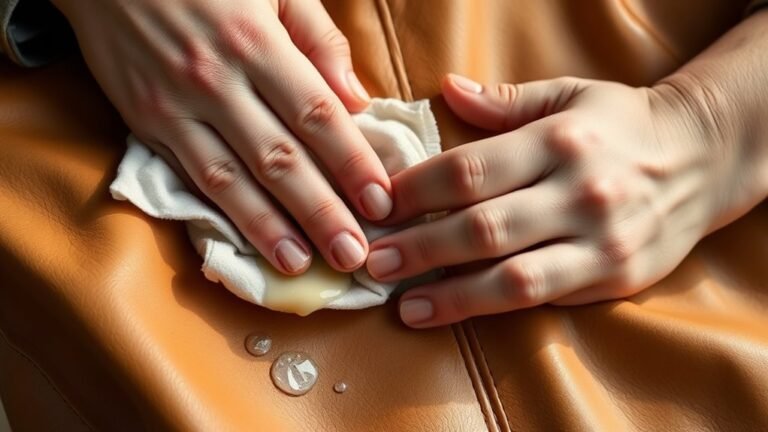
Use a Soft Cloth to Gently Clean the Area
Although the cleaner has had time to work, you’ll need to take a soft cloth and gently wipe the stained area to lift the loosened oil away.
Be careful not to scrub hard, as that might damage the leather’s surface. Use smooth, circular motions and let the cloth absorb the oil.
Avoid harsh scrubbing; gently wipe in smooth circles to protect leather and absorb the oil effectively.
Here’s how to do it right:
- Choose a clean, soft cloth like microfiber or cotton.
- Fold the cloth to create a fresh, absorbent surface.
- Wipe the stain gently, applying light pressure.
- Replace the cloth section as it becomes oily to avoid spreading the stain.
This careful approach will help you see the stain fade while protecting your leather’s natural texture and beauty.
Wipe Away Cleaner Residue With a Damp Cloth
After gently lifting the oil with a soft cloth, you’ll want to remove any remaining cleaner residue to prevent buildup on your leather. Grab a clean, damp cloth. Make sure it’s just slightly wet, not soaked.
Wipe the stained area softly in circular motions to lift away leftover cleaner without damaging the leather. Rinse and wring the cloth often to avoid spreading residue.
| Step | Action |
|---|---|
| 1 | Dampen a clean cloth |
| 2 | Wipe the stained area gently |
| 3 | Rinse and wring cloth frequently |
| 4 | Continue until residue disappears |
This guarantees your leather stays clean and ready for conditioning.
Condition the Leather to Restore Moisture
Because cleaning can strip your leather of its natural oils, you’ll want to condition it to restore moisture and keep it supple. Conditioning helps prevent cracking and extends your leather’s life, making it look vibrant and soft again.
Here’s how to do it right:
- Choose a conditioner suitable for your leather type to avoid damage.
- Apply a small amount evenly with a soft cloth, working it gently into the surface.
- Let the conditioner absorb fully to nourish the leather deeply.
- Buff lightly with a clean cloth to bring out a natural shine and smooth texture.
Allow the Leather to Air Dry Naturally
While it’s tempting to speed up the drying process, you should always let leather air dry naturally to prevent damage. Using heat sources like hair dryers or radiators can dry out the leather, causing it to crack or become stiff.
Instead, place the leather item in a well-ventilated area away from direct sunlight and heat. This gentle drying ensures the leather retains its natural oils and flexibility.
Be patient; drying may take several hours or even a day depending on the thickness of the leather and humidity levels. Avoid handling the leather while it’s drying to prevent reintroducing dirt or oils.
Allowing it to dry naturally sets the foundation for maintaining its appearance and durability after cleaning.
Frequently Asked Questions
Can Oil Stains on Leather Cause Permanent Damage?
Yes, oil stains on leather can cause permanent damage if you don’t act quickly. They can darken, weaken, and deteriorate the material, so it’s important you clean them promptly to protect your leather’s appearance and durability.
Are There Any Household Items to Avoid on Leather Stains?
You should avoid using harsh chemicals like bleach, ammonia, or acetone on leather stains. These can damage the leather’s finish.
Also, steer clear of excessive water or abrasive scrubbing, as they can cause discoloration and wear.
How Often Should Leather Be Conditioned After Cleaning?
You should condition your leather every 3 to 6 months after cleaning, like giving it a nourishing drink.
This keeps it supple and glowing, preventing cracks and dryness from sneaking in like unwanted shadows.
Can Professional Cleaning Remove All Types of Oil Stains?
Professional cleaning can remove most oil stains, but some deeply set or old stains might not come out completely.
You should still act quickly and consult a specialist to increase the chances of full removal.
Is It Safe to Use Heat to Dry Leather After Cleaning?
You shouldn’t use heat to dry leather after cleaning because it can cause cracking or shrinking.
Instead, let it air dry naturally at room temperature to keep your leather soft and in good condition.
Conclusion
Just like a skilled gardener tending to a delicate rose, you’ve carefully nurtured your leather back to life. By patiently following these steps, you’ve lifted the stubborn oil stain without harming its natural beauty.
Now, with the leather conditioned and air-dried, it’s ready to shine again—resilient and smooth, much like a classic novel restored to its original charm. Keep this care in mind, and your leather will age gracefully, telling its own timeless story.
Remember, regular maintenance and using the right products are key in cleaning oil stains from leather effectively. With these 10 steps to clean oil stains from leather, you ensure your favorite items stay beautiful and durable for years to come.