How to Sew Patches on Leather by Hand: Step-by-Step Guide
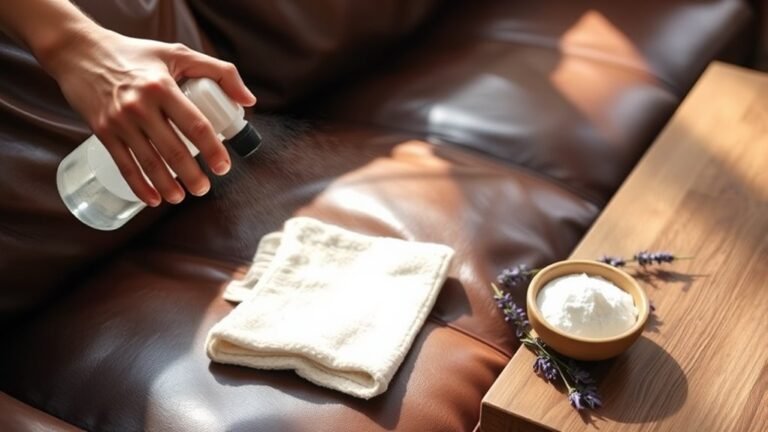
To sew patches on leather by hand, start by cleaning the leather surface thoroughly to remove any dirt or oils.
Position the patch securely using tape or a suitable adhesive to hold it in place during sewing.
Using heavy-duty leather needles and strong waxed thread is essential for durability and ease of stitching.
Carefully punch holes through the leather and patch to guide your stitches.
Secure the edges with tight whipstitches or saddle stitches to ensure the patch stays firmly attached.
Be sure to knot the thread firmly at both the start and end of your sewing to prevent unraveling.
Once you have finished sewing, trim any excess threads neatly.
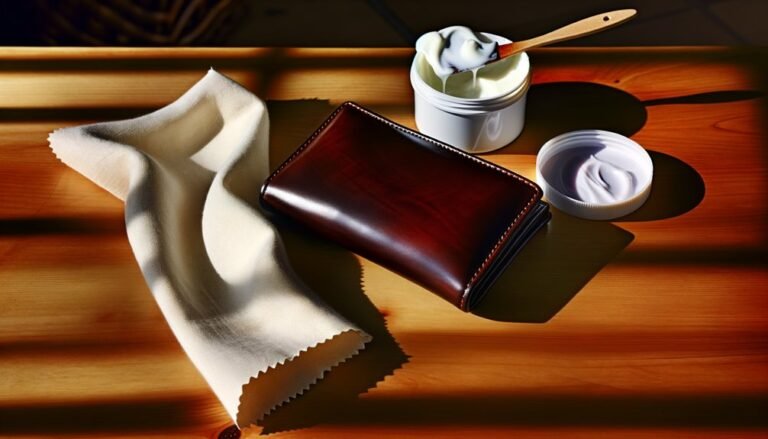
Finally, apply a leather conditioner to maintain the suppleness and longevity of the leather.
With these basics, you’re prepared to explore techniques that guarantee lasting, professional-looking results when sewing patches on leather by hand.
Preparing Your Leather and Patch for Sewing

Before you start sewing, make sure to clean the leather surface with a damp cloth to remove any dirt or oils that could affect adhesion. Once the leather is clean, position your patch carefully and use masking or painter’s tape to hold it in place temporarily. This helps you achieve proper alignment before sewing.
If the leather item has a lining, you might need to slit it for better access around the patch edges. To keep the patch steady during sewing, you can apply a light layer of spray adhesive or double-sided tape on its back. These steps guarantee the patch won’t shift while you sew, making your work neater and more durable.
Proper preparation sets the stage for strong, long-lasting sewing on leather.
Selecting the Right Tools and Materials

You’ll need the right needle and strong, waxed thread to handle leather without damaging it. Using adhesives can help keep your patch in place before you start sewing.
Don’t forget to gather leather-compatible tools like a thimble and awl to make the process smoother and more precise.
Needle and Thread
When sewing patches on leather by hand, choosing the right needle and thread makes a huge difference in both ease and durability. Use a heavy-duty leather needle, like size 90/14 or 100/16, designed to penetrate thick leather without bending or breaking.
For thread, pick strong, abrasion-resistant options such as 100% nylon or polyester upholstery thread to ensure your stitches last. Match the thread color to your leather or patch for a subtle look, or go for contrasting colors to add flair.
Before you start hand sewing, wax the thread to reduce friction and tangling, which helps maintain consistent stitch tension. Finally, double your thread length, securely thread the needle, and tie a knot at the end to prevent unraveling while you sew.
Adhesives for Positioning
Although sewing patches by hand gives you control, using the right adhesives can make positioning much easier and more precise. Start by applying a light spray adhesive or double-sided tape made for leather to the back of your patch.
Apply it evenly, avoiding excess that might seep beyond the edges. Wait until the adhesive becomes tacky before positioning the patch on your leather surface to ensure it holds firmly. For extra security, use a small piece of masking or painter’s tape to keep the patch aligned during sewing.
This tape helps hold everything in place without damaging the leather. Once you finish sewing, carefully remove the tape or adhesive backing to avoid leaving residue or harming the leather’s finish.
Leather-Compatible Tools
Since leather is a tough material, selecting the right tools is essential to make sewing patches easier and more durable. Use a heavy-duty needle designed for leather to pierce the thick material effortlessly.
Waxed thread, preferably nylon or polyester, prevents tangling and lasts longer. An awl or leather punch helps create clean, evenly spaced holes, reducing stress on the leather and simplifying stitching.
| Tool | Purpose |
|---|---|
| Heavy-duty needle | Penetrates thick leather easily |
| Waxed thread | Durable, tangle-free stitching |
| Awl | Creates precise stitching holes |
| Leather punch | Makes evenly spaced holes |
| Adhesive | Temporarily secures patches |
Always test your tools on scrap leather before starting your project to ensure the best results.
Positioning and Securing the Patch

Before you start sewing, you’ll want to position and secure the patch carefully to guarantee it stays perfectly aligned. Begin by determining the ideal patch placement on your leather piece, then mark the exact spot with fabric chalk or a marker to ensure precision.
Carefully position and mark your patch to ensure perfect alignment before sewing on leather.
Use double-sided tape or spray adhesive to temporarily hold the patch in place. This prevents shifting during sewing and helps maintain smooth, wrinkle-free positioning.
If your leather item has a lining, open it or create a small access point to better control patch placement. Finally, secure the patch with clips or pins along the edges, especially on curves or intricate areas, to keep it stable.
These steps streamline your leather working process and prepare you for neat, professional hand stitching.
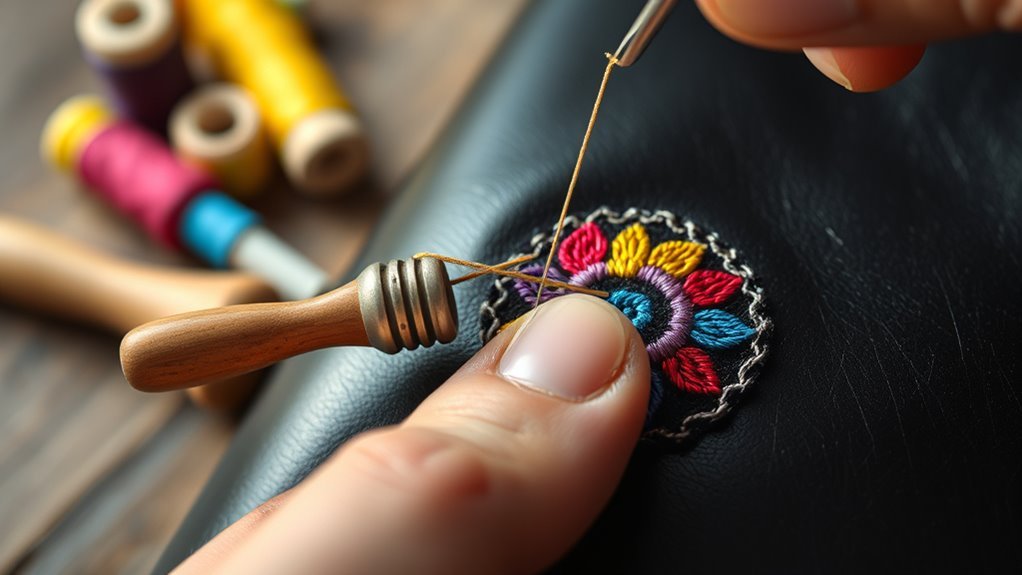
Hand Sewing Techniques for Leather Patches
When you’re ready to sew the patch onto leather, choose a heavy-duty needle and strong nylon or polyester thread to guarantee durability. Begin by marking the patch’s placement with chalk or a fabric pencil, then secure it with clips or pins to keep it from shifting.
For effective hand sewing, use stitching techniques like small, tight whipstitches or running stitches, maintaining even spacing around the edges. To facilitate sewing patches and reduce stress on the leather, punch holes along the stitching line with an awl before stitching.
Finally, knot the thread securely at both the start and end of your work, trimming any excess. These careful hand sewing methods ensure your leather patches stay strong and look professional.
Stitch Patterns for Durability and Appearance
Mastering the right stitch pattern can make a big difference in how durable and attractive your leather patch looks. Start with a saddle stitch, which uses two needles and one thread to create a strong, neat seam.
Choosing the right stitch, like the strong and neat saddle stitch, enhances your leather patch’s durability and appearance.
Keep your stitch length consistent, around 1/8 to 1/4 inch, to avoid weak spots and ensure even appearance. Reinforced stitches, like double or triple stitching, help your patch resist stress and last longer.
For a decorative yet sturdy finish, try a whipstitch sewn close to the edge.
- Use saddle stitch for strength and tidy seams
- Maintain consistent stitch length for durability
- Apply reinforced stitches or whipstitch for extra toughness and style
Finishing Touches and Reinforcement
To finish your patch sewing, make sure you secure the stitch ends by overlapping them at least an inch and knotting tightly. Trim any excess thread close to the knot to keep the work neat and strong. Then, reinforce high-stress areas with extra stitches to boost the patch’s durability.
Securing Stitch Ends
Although sewing the patch is nearly complete, you’ll need to secure the stitch ends to prevent unraveling and guarantee durability. Start by making a small backstitch at both the beginning and end of your sewing line to lock the stitches in place.
Once you finish sewing, thread the needle through several stitches before pulling tight to create a strong knot. For extra reinforcement, sew over the stitch ends with a few more stitches.
Finally, trim the thread close to the knot, ensuring it’s tight and flush with the leather. You can also apply a drop of leather-friendly fabric glue or seam sealer over the knot for added security.
- Backstitch at start and end to lock stitches
- Create a knot by threading through stitches
- Optional: reinforce with glue or extra stitches
Thread Trimming Techniques
Securing your stitch ends sets the stage for neat thread trimming techniques that complete your patch sewing. After tying a knot or backstitch, leave a small tail of about 1/4 inch before you trim the thread.
Use sharp scissors or thread snips to cut close to the knot. This prevents the thread from unraveling. For a clean finish, gently tuck any loose thread ends into the seam or underneath stitches with a needle.
If you want extra security, apply a small amount of clear fabric or leather glue on the trimmed thread ends to stop fraying. Throughout your sewing, regularly check for loose or frayed threads and trim them promptly with your scissors.
This keeps your patch looking professional and well-finished every time.
Reinforcing Patch Durability
When you want your patch to last, reinforcing its edges with double or triple stitches adds essential strength. Using a reinforced stitch pattern like a backstitch or saddle stitch gives extra security, ensuring the patch stays firmly attached over time.
For high-stress areas, sewing through doubled thread or adding a second layer of stitching markedly boosts durability. You can also apply a thin layer of fabric glue or seam sealer along the stitched border to prevent fraying.
To reinforce patch durability effectively, focus on:
- Using double stitches around the edges for added strength
- Incorporating a reinforced stitch pattern to secure the patch firmly
- Sewing through doubled thread in high-stress spots for extra security and longevity
Tips for Maintaining Your Leather Patch Work
To keep your leather patch work looking its best, you should regularly check for loose threads or fraying and reinforce stitches as needed. Proper maintenance guarantees your patches stay durable and secure.
Clean your leather patches gently using a damp cloth and mild soap to remove dirt without damaging the material. Applying leather conditioner periodically keeps the leather supple and prevents cracking that could stress the stitches.
Avoid exposing your leather patches to excessive moisture or direct sunlight, as these can cause fading or warp the material, weakening the stitches. When not in use, store your leather items in a cool, dry place to preserve both the patches and the stitching.
Consistent care helps maintain the strength and appearance of your sewn leather patches over time.

Frequently Asked Questions
Can You Hand Sew Patches on Leather?
Yes, you can hand sew patches on leather. You’ll need a heavy-duty needle, strong thread, and tools like an awl and thimble.
This method gives you precise control, perfect for detailed or delicate patches.
How Do You Attach Patches to Leather?
You attach patches to leather by positioning them securely, punching holes through both pieces, and sewing around the edges with strong thread and a heavy-duty needle. Use tight, even stitches to make certain of durability and prevent shifting.
What Is the Best Stitch for Hand Sewing Leather?
The best stitch for hand sewing leather is the saddle stitch. It creates a strong, durable seam by passing two needles through each hole from opposite sides.
This technique ensures your patch holds up under heavy use and tension.
Can You Sew Leather Without a Sewing Machine?
Yes, you can sew leather without a machine. In fact, over 70% of artisans hand-stitch leather for precision.
Use heavy-duty needles, strong thread, and an awl to punch holes, ensuring durable, neat stitches.
Conclusion
Now that you’ve mastered sewing patches on leather by hand, your handiwork will stand the test of time like a ship weathering the fiercest storms. With the right tools, careful stitching, and a bit of patience, you’ll give your leather pieces new life and character.
Keep practicing these techniques, and your patches won’t just stick—they’ll become a seamless part of your style, strong and enduring as the leather itself. Mastering how to sew patches on leather by hand ensures durability and adds a personalized touch to your leather items.
By honing your skills in hand sewing leather patches, you create lasting repairs and unique designs that highlight your craftsmanship. Embrace the process, and your leather patches will remain both functional and fashionable for years to come.