How to Fix Ripped Leather on Doc Martens: Step-by-Step Repair Guide
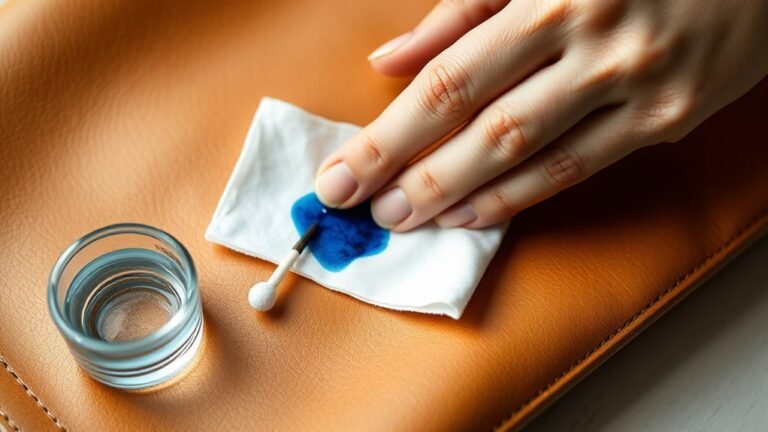
To fix ripped leather on your Doc Martens, start by cleaning the damaged area thoroughly. Proper cleaning ensures better adhesion and a longer-lasting repair.
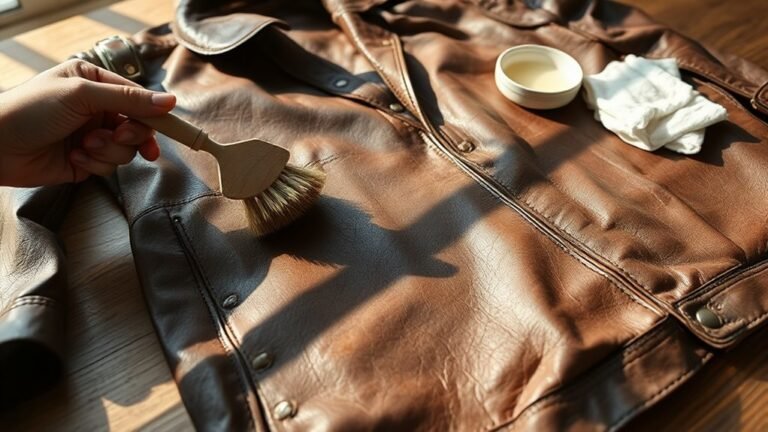
Choose a leather patch that matches your boots’ color and texture, then apply a strong adhesive beneath both the tear and patch.
Press firmly to secure the patch in place and reinforce the repair with durable stitches using heavy-duty thread and needles. This will add extra strength to the fix and prevent further damage.
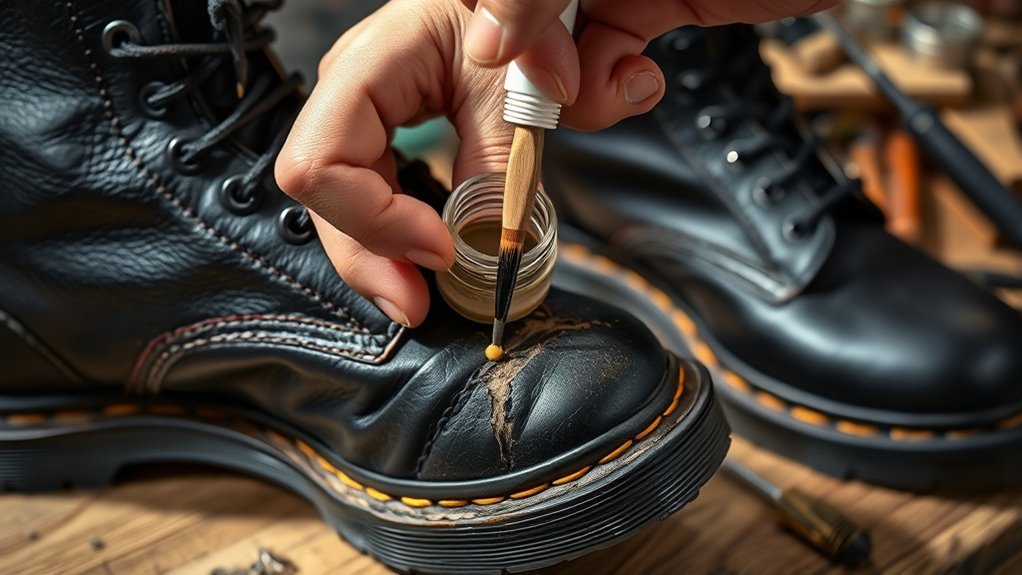
Smooth gaps with leather filler and blend with dye for a seamless look.
If the rip is large or near seams, professional help might be best. Experienced cobblers can handle complex repairs and restore your boots effectively.
You can find out how to perfect the process and when to call an expert below.
Preparing Your Doc Martens for Repair

Before you begin repairing your ripped Doc Martens, make sure to clean the damaged area thoroughly to remove any dirt and oils, as this will help the repair materials adhere properly. Since Doc Martens often feature textured leather, you’ll want to use a soft brush or cloth to gently clean without damaging the grain.
Next, assess the size and location of the rip to decide whether patching or reinforcement fits best. Check the surrounding textured leather for any weak spots that might need extra care. If the tear is large, temporarily secure the edges with tape or cloth to keep things stable during repair.
Taking these steps guarantees your repair materials adhere well and your Doc Martens stay durable after the fix.
Selecting the Right Leather Patch and Tools

You’ll want to pick a leather patch that matches your Doc Martens in color, texture, and thickness for a smooth fix. Make sure to have the right tools on hand, like a sharp knife, strong adhesive, and a heavy-duty needle.
Matching the leather’s feel and flexibility will help your repair blend in and last longer.
Choosing Patch Material
A well-chosen leather patch makes all the difference when fixing ripped Doc Martens. You want a patch that closely matches your boot’s color, texture, and thickness to keep the repair discreet and authentic.
Opt for high-quality full-grain or approved repair leather to guarantee durability and a professional look. When preparing your patch, cut it slightly larger than the tear with rounded edges to prevent peeling and create a smooth finish.
For bigger or stressed rips, consider adding leather interfacing or backing for extra strength. Choosing the right patch material not only restores your boots’ function but also maintains their iconic style, setting you up perfectly for the next repair steps.
Essential Repair Tools
Matching your leather patch perfectly is just the start; selecting the right tools will make the repair process smoother and more effective. First, grab a sharp razorknife or scissors to cut your patch slightly larger than the rip for full coverage.
Use a heavy-duty stitching needle and strong, waxed thread designed for leather to ensure durable stitching. Apply a high-quality contact cement or leather adhesive to bond the patch securely underneath the tear before sewing.
Don’t forget essential extras like leather filler to smooth out imperfections, fine sandpaper to prep surfaces, and leather dye or paint to blend the repair. Having these tools ready will set you up for a neat, long-lasting fix on your Doc Martens.
Matching Leather Texture
Although finding the perfect leather patch can be challenging, selecting one that closely matches the color, grain, and texture of your Doc Martens is essential for a seamless repair. Use a textured leather scrap with similar weight and finish to blend naturally.
Choose tools like a razor knife, heavy-duty stitching needle, and contact cement for secure attachment. Test patches and adhesives on a hidden spot first to ensure color match and adhesion.
Leather filler helps smooth gaps before patching.
| Feature | What to Look For | Why It Matters |
|---|---|---|
| Color | Match existing leather | Seamless visual blend |
| Grain | Similar texture pattern | Natural finish |
| Weight | Comparable thickness | Consistent durability |
| Tools | Razor knife, needles | Precise cutting & sewing |
| Adhesive | Contact cement | Strong, lasting bond |
Step-by-Step Patch Application Process

Before you start fixing your ripped Doc Martens, cut a leather patch slightly larger than the tear, making sure it matches the shoe’s color and texture. This guarantees a seamless repair.
Next, follow these steps:
- Apply strong contact cement to the underside of the ripped area and the patch, then press firmly to bond them securely.
- Stitch carefully along the original seam lines around the rip and patch to reinforce the repair and create a natural look.
- Use leather filler to smooth out any gaps or uneven edges, allowing it to dry before sanding lightly.
- Finish by painting or conditioning the patched area to blend it with the rest of the shoe, giving a professional, polished appearance.
Techniques for Stitching and Reinforcement
To repair your ripped Doc Martens leather, start by choosing the right stitching method and reinforcement materials. You’ll want to use strong thread and consider adding patches or extra stitching for durability.
Strengthening the seams with techniques like cross-stitching will help prevent the tear from coming back.
Stitching Methods Overview
When you repair ripped leather on your Doc Martens, stitching plays a crucial role in reinforcing the tear and preventing it from worsening. Choosing the right stitching method ensures a durable, clean fix. Here are key techniques to consider:
- Use a heavy-duty needle and waxed thread that matches your leather for strong, neat stitches.
- Apply double or triple stitching along the tear to boost durability and stop further splitting.
- Employ saddle stitching to maintain even tension, creating a secure and long-lasting repair.
- Finish with a backstitch at stitch ends to prevent unraveling and add extra security.
Mastering these methods will help you restore your Docs effectively and extend their life.

Reinforcement Material Options
Although stitching is essential, reinforcing the ripped area with additional materials considerably boosts your Doc Martens’ durability. You can stitch leather patches from the underside of the rip to add strength without altering the shoe’s look.
Using heavy-duty sewing needles and strong thread like waxed linen or nylon ensures your stitches hold tight. Before stitching, apply high-quality contact cement to improve adhesion and stability.
For high-stress spots, consider adding leather rivets or metal fasteners to prevent further tearing. Reinforcing stitches along original seam lines not only maintains the shoe’s aesthetic but also distributes stress evenly, helping the repair last longer.
These reinforcement options combined give your Docs a robust, durable fix that stands up to daily wear.
Seam Strengthening Techniques
Since ripped leather on your Doc Martens faces constant stress, strengthening the seams with precise stitching techniques becomes essential. To guarantee a durable repair, you’ll want to focus on these key methods:
- Double-stitch the tear using a heavy-duty needle and strong thread to boost seam durability.
- Attach a leather patch underneath the rip, stitching securely around its edges for extra reinforcement.
- Use a tight, consistent stitch pattern with either matching or contrasting thread to both strengthen and beautify the seam.
- Add rivets or metal fasteners at high-stress points to evenly distribute tension and reduce future ripping risks.
Applying a leather bonding agent before stitching can also help secure fibers and minimize seam stress, making your repair last longer.
Matching Color and Texture for a Seamless Finish
To achieve a seamless finish on your ripped Doc Martens, you’ll want to carefully match both the color and texture of the repair patch to the original leather. Start by selecting a textured leather patch that closely mimics the grain and finish of your boots.
Before applying, condition the leather surface to ensure it’s smooth and ready for the dye or paint. Use a leather dye or color-matching paint to blend the patch with the existing leather tone precisely. After securing the patch, lightly sand the area to create an even surface that blends naturally. Finally, apply a leather sealant or conditioner to lock in the color and preserve the leather’s authentic look and feel, giving your Doc Martens a flawless appearance.
When to Seek Professional Repair Services
When your Doc Martens have a large or deep rip, especially near a seam, it’s best to turn to professional repair services for a lasting solution. You’ll want expert help when:
- The rip is too extensive for DIY materials to fix effectively.
- The damage affects structural parts, risking the shoe’s integrity.
- Your boots hold sentimental value or are expensive, needing careful restoration.
- You’re unsure about repair costs or the severity of the damage and want a professional assessment.
Professionals use original materials and precise stitching techniques that are tough to replicate at home. Getting a quote helps you decide if repairing or replacing makes more sense. Trusting an expert ensures your Docs look great and last longer.
Frequently Asked Questions
Can Dr. Martens Leather Be Repaired?
Yes, you can repair Dr. Martens leather using quality materials and expert techniques. For minor rips, you can patch or fill them, but for extensive damage, it’s best to seek professional repair services to guarantee durability.
Can Ripped Leather Be Repaired?
Yes, you can repair ripped leather on your Doc Martens. Using leather patches or fillers, you can fix small tears yourself, but for bigger rips, you might want to trust a professional for the best, lasting results.
Do Doc Martens Have a Lifetime Guarantee?
No, Doc Martens don’t have a lifetime guarantee. Their warranty usually covers manufacturing defects for about a year.
For wear, tear, or damage, you’ll need to explore repairs or third-party services instead.
Can Holes in Doc Martens Be Fixed?
Yes, you can fix holes in your Doc Martens. Small ones are best patched or stitched by yourself or a pro, while larger damage might need professional repair for the best, lasting results.
Conclusion
Fixing ripped leather on your Doc Martens is like giving your boots a second chance to tell their story. With the right patch, tools, and careful stitching, you can restore both look and strength. Remember to match the color and texture for a seamless finish.
If the damage feels beyond your skill, don’t hesitate to seek professional help. Your Docs deserve care that keeps them walking strong and stylish for miles to come. Properly fixing ripped leather on Doc Martens ensures durability and maintains their iconic style.