7 Steps to Upholster a Leather Headboard
To upholster a leather headboard, start by gathering your materials like leather, foam padding, spray adhesive, and tools. Having the right supplies is essential for a smooth upholstery project. Prep the headboard frame by cleaning and smoothing it for a sturdy base.
Choose and cut leather to size, then attach foam padding securely with adhesive. Stretch the leather over the foam and staple it on the back, folding corners neatly. Finish the edges for a polished look, then mount your headboard firmly.
Keep going to discover tips that’ll make your project even smoother and ensure a professional finish on your leather headboard upholstery.
Gather Materials and Tools

Before you begin upholstering your leather headboard, gather all the necessary materials and tools to guarantee a smooth process. You’ll need quality leather or faux leather fabric, foam padding for comfort, and batting to create a soft finish.
Don’t forget heavy-duty spray adhesive to secure the foam and batting to the headboard base. Grab a staple gun with plenty of staples to fasten the fabric tightly.
Scissors, a measuring tape, and a marker will help you cut materials accurately. Have a screwdriver or drill handy if you need to remove or reattach the headboard.
Finally, keep a hammer nearby for any minor adjustments.
Preparing all these items beforehand saves you time and prevents interruptions while upholstering.
Prepare the Headboard Frame

Once you’ve gathered all your materials, start by inspecting the headboard frame to guarantee it’s sturdy and free of damage. Check for loose joints, cracks, or splinters that could affect stability. Tighten any screws or bolts and reinforce weak areas with wood glue or brackets.
Sand rough spots to create a smooth surface, ensuring the leather will adhere evenly. If your frame has an old fabric or padding, remove it completely to avoid lumps under the new upholstery.
Wipe down the frame to clear dust and debris, which can interfere with glue or staples. Preparing the frame properly sets a solid foundation, making the upholstering process smoother and extending the life of your leather headboard.
Choose and Cut the Leather

With your headboard frame prepped and ready, it’s time to select the right leather for your project. Choose a leather that’s durable, flexible, and complements your bedroom décor.
Consider thickness and texture; smoother leather works well for a sleek look, while pebbled leather adds character. Measure your headboard carefully, adding a few extra inches on all sides to ensure full coverage and enough material for wrapping around the frame’s edges.
Lay the leather flat on a clean surface, smoothing out any wrinkles. Use a sharp utility knife or rotary cutter to make precise cuts, following your measurements closely.
Cutting accurately now saves you from fitting problems later, so take your time and double-check dimensions before proceeding.
Attach Foam Padding to the Frame
Although selecting and cutting the leather is essential, you should now focus on attaching the foam padding to your headboard frame to create a comfortable, cushioned base.
Start by cutting a piece of foam to match the headboard’s dimensions, ensuring it’s thick enough for comfort but not too bulky.
Lay the foam over the frame, smoothing out any wrinkles or folds.
Use spray adhesive or a strong glue designed for upholstery to secure the foam firmly to the wood.
Press the foam down evenly and allow the adhesive to set according to the manufacturer’s instructions.
This step provides the soft, supportive layer that enhances both comfort and appearance, setting you up perfectly for the next stage of upholstering your leather headboard.
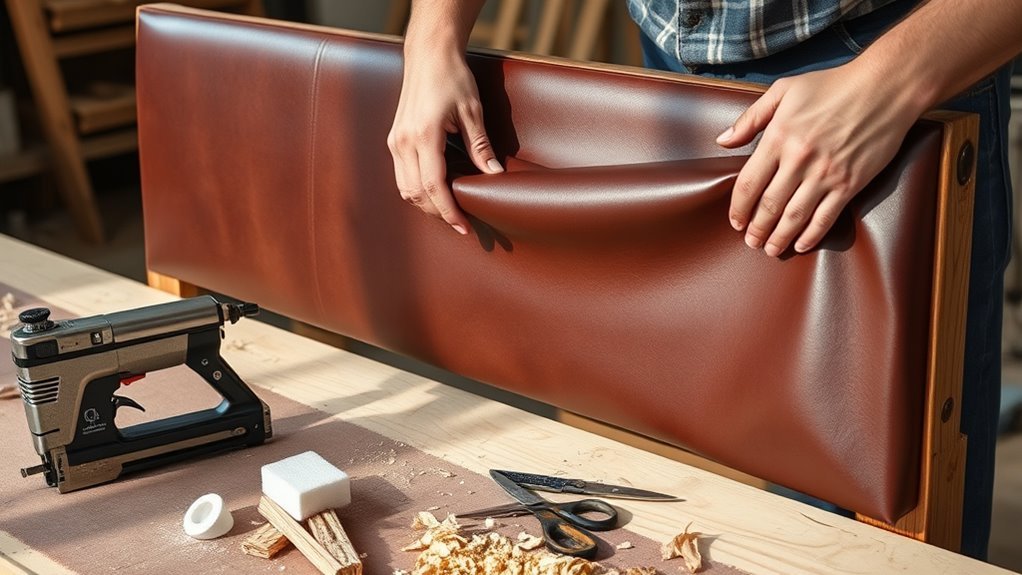
Secure the Leather Upholstery
After the foam padding is securely in place, you’ll want to carefully lay your leather over the headboard, ensuring it’s smooth and properly aligned.
Start by pulling the leather taut from one side, then staple it to the back of the frame.
Work your way around the headboard, alternating sides to maintain even tension and avoid wrinkles.
Use a staple gun with enough staples spaced about an inch apart to hold the leather firmly.
Take extra care at the corners, folding the leather neatly without creating bulky bunches.
If needed, trim any excess material to prevent sagging.
Securing the leather tightly is essential for a polished, professional look and to keep the upholstery durable over time.
Finish the Edges and Corners
Once you’ve secured the leather smoothly over the headboard, focus on finishing the edges and corners to guarantee a clean, professional appearance. Begin by trimming any excess leather, leaving about one to two inches around the perimeter.
Gently fold the edges under, ensuring they lie flat against the back of the headboard. Use a staple gun or upholstery tacks to secure the folded edges neatly.
For the corners, create small, precise folds like mitered corners to avoid bulk and wrinkles. Take your time to smooth the leather as you go, preventing puckering.
If needed, apply a dab of strong adhesive inside the folds for extra hold.
This careful attention to edges and corners will give your leather headboard a polished, seamless finish that lasts.
Mount the Upholstered Headboard
How do you securely attach your newly upholstered leather headboard to the bed frame or wall? First, determine your mounting method, either wall-mount or bed frame attachment.
For wall mounting, locate studs using a stud finder and mark their positions. Drill pilot holes in the headboard and wall, then use heavy-duty screws and wall anchors for stability.
If attaching to the bed frame, align the headboard’s mounting brackets with the frame’s holes. Secure them with bolts and nuts, tightening firmly.
Always double-check that the headboard is level before fully tightening. Finally, test the stability by gently pushing and pulling to ensure it’s secure.
Proper mounting not only keeps your headboard in place but also enhances safety and durability.
Frequently Asked Questions
How Do I Clean and Maintain a Leather Headboard?
You should regularly dust your leather headboard with a soft cloth and clean it using a damp cloth with mild soap.
Don’t forget to condition the leather every 6-12 months to keep it soft and prevent cracking.
What Type of Leather Works Best for Upholstery?
Think of full-grain leather as the king of upholstery—it’s durable, ages beautifully, and breathes well.
You’ll want it for your headboard to guarantee it stays soft, strong, and stylish through everyday use and time.
Can I Use Faux Leather Instead of Real Leather?
Yes, you can use faux leather instead of real leather. It’s more affordable, easier to clean, and animal-friendly.
Just make certain you pick a high-quality faux leather that’s durable and flexible for upholstery projects like your headboard.
How Long Does the Upholstery Process Typically Take?
You won’t believe it, but upholstering usually takes just a few hours to a day.
If you’re quick and focused, you’ll wrap and staple that headboard before you can binge-watch your favorite show!
What Tools Are Safe to Use on Delicate Leather Surfaces?
You should use soft, non-abrasive tools like microfiber cloths, foam brushes, and plastic or wooden smoothing tools on delicate leather.
Avoid metal or sharp instruments to prevent scratches and always test cleaners on a hidden spot first.
Conclusion
Now that you’ve transformed your headboard with leather upholstery, you’re not just adding style—you’re crafting a statement piece that speaks volumes about your taste. Like a perfectly tailored suit, your handiwork wraps your room in comfort and elegance.
So, step back and admire your creation; every stitch tells a story of patience and skill.
Remember, your headboard isn’t just furniture—it’s the crown jewel of your bedroom sanctuary. Upholstering a leather headboard adds a unique touch of luxury and durability, making your bedroom truly stand out.