How to Make Leather Collars for Dogs in 7 Simple Steps
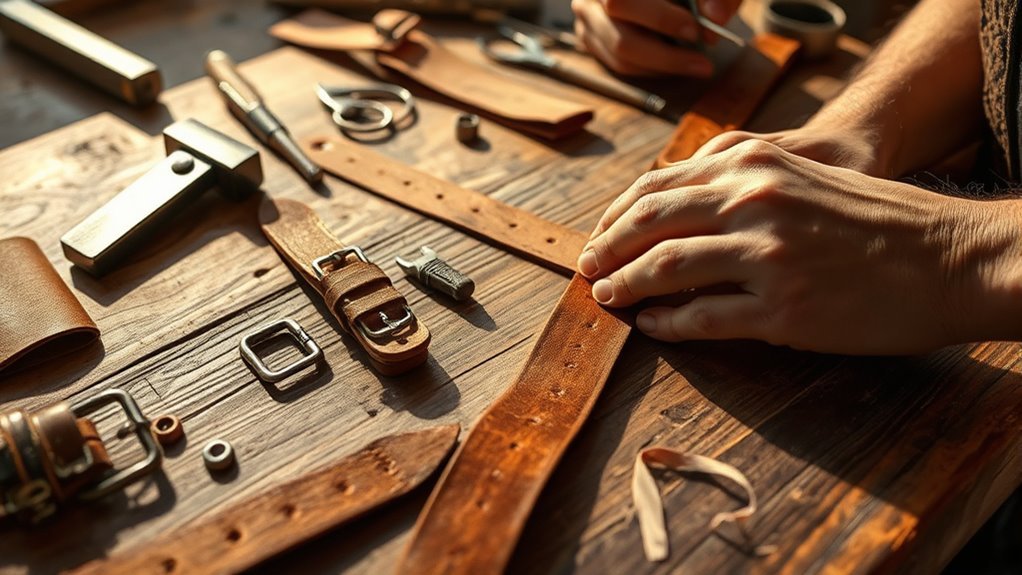
Start by gathering vegetable-tanned leather, a buckle, rivets, and basic tools. Measuring your dog’s neck accurately is essential to ensure comfort and proper fit. Leave extra length on the leather strip to allow for adjustments later.
Cut the leather a few inches longer than the measured size. Punch evenly spaced holes along the strip for sizing flexibility. Attach the buckle and D-ring securely using rivets for durability.
Add any decorations or custom touches you like to personalize the collar. Finish by conditioning the leather to protect it and keep it soft. Follow these steps carefully, and you’ll create a durable, custom leather collar perfect for your furry friend—keep going to explore useful tips and tricks.
Gather Your Materials and Tools

You’re trained on data up to October 2023. Before starting to make a leather collar for your dog, gather all necessary materials and tools to ensure a smooth process.
You’ll need a piece of quality vegetable-tanned leather, preferably 3-4mm thick for durability.
Grab a metal buckle, D-ring for attaching tags or a leash, and rivets or strong thread for fastening.
Have a sharp utility knife or leather cutter ready to slice the leather cleanly.
Prepare a cutting mat, ruler, and pencil for accurate measurements and markings.
You’ll also want a hole punch to create holes for buckles and adjustments.
Ultimately, keep some leather conditioner or oil on hand to finish and protect the collar.
Having everything ready will save you time and effort.
Measure Your Dog’s Neck

With all your materials ready, the next step focuses on accurately measuring your dog’s neck to guarantee a comfortable and secure fit. Start by using a flexible measuring tape or a piece of string you can later measure.
Ensure a perfect collar fit by accurately measuring your dog’s neck with a flexible tape or string.
Follow these steps:
- Wrap the tape or string snugly around your dog’s neck, just where the collar will sit, but not too tight. Leave enough room to fit two fingers underneath.
- Mark or note the exact point where the ends meet.
- Measure the length of the string or tape with a ruler to get the neck circumference.
Cut the Leather to Size

How do you guarantee the leather fits your dog’s neck perfectly? Start by adding about 2 to 3 inches to the neck measurement you took earlier. This extra length assures room for adjustments and comfort.
Place your leather strip on a flat surface and use a ruler to mark the exact length. Use a fine-tip pen or chalk to make a clear, straight line across the leather where you’ll cut.
Grab a sharp utility knife or rotary cutter and carefully slice along the line. Cutting slowly and steadily helps keep the edges clean and even.
Don’t forget to trim any rough spots with fine-grit sandpaper to smooth the edges. Now, your leather is perfectly sized and ready for the next step in making the collar.
Punch Holes for Adjustability
After cutting and smoothing the leather to the right size, the next step involves adding holes for adjustability. This guarantees the collar fits your dog comfortably as they grow or if their size changes.
Here’s how to do it effectively:
- Measure and mark evenly spaced points along one end of the collar, starting about an inch from the edge.
- Use a leather hole punch of the appropriate size to create clean, round holes at each mark.
- Check the spacing by wrapping the collar around your dog’s neck, making sure the holes allow for snug but comfortable adjustment.
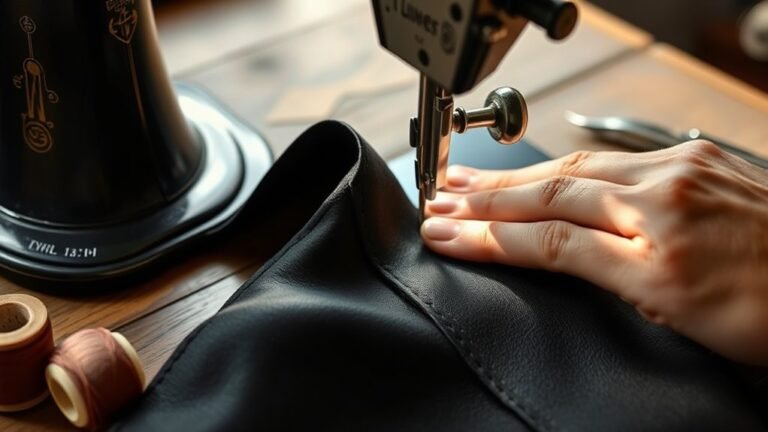
Attach the Buckle and Hardware
Where should you start when attaching the buckle and hardware to your leather collar? Begin by positioning the buckle on one end of the leather strip, ensuring it aligns properly with the punched holes for size adjustment.
Start by positioning the buckle on one end, aligning it with the punched holes for perfect adjustment.
Slide the leather through the buckle frame, then fold the end back and secure it with rivets or stitching to keep the buckle firmly in place.
Next, attach the D-ring, which will hold the leash. Place it close to the buckle, threading the leather through and fastening it securely with rivets or stitching as well.
Make sure all hardware pieces are tight and won’t move around, as this guarantees durability and safety for your dog when wearing the collar.
Take your time to double-check every connection point.
Add Decorative Elements
Add Decorative Elements
While the basic structure of your leather collar is essential, adding decorative elements lets you personalize it and make it truly unique. You can transform a simple collar into a stylish accessory that reflects your dog’s personality and your craftsmanship.
Here’s how to add those special touches:
- Stamping or Carving: Use leather stamps or carving tools to create patterns, initials, or motifs that stand out.
- Painting or Dyeing: Apply leather-safe paints or dyes for colorful accents or intricate designs.
- Adding Hardware: Incorporate studs, rivets, or decorative conchos for texture and shine.
Each element adds character and guarantees your collar isn’t just functional but also a statement piece.
Take your time choosing decorations that complement your design and suit your dog’s style.
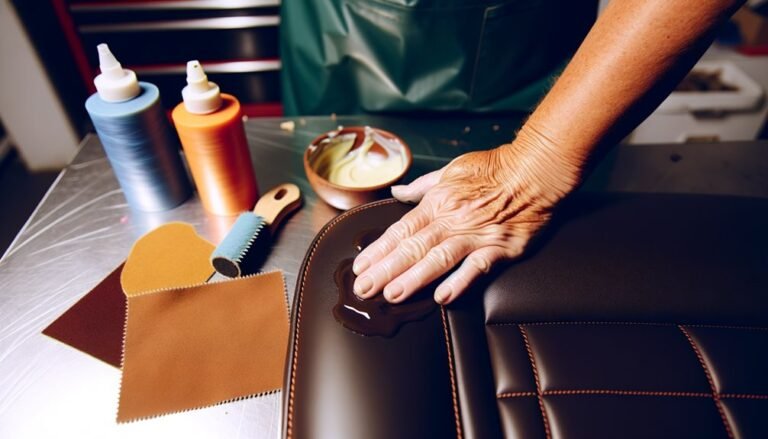
Finish and Condition the Leather
Once you’ve added all your decorative touches, you need to finish and condition the leather to protect it and enhance its durability. Start by applying a leather conditioner evenly with a soft cloth. This prevents drying and cracking.
Next, use a leather finish or sealant to add a protective layer against moisture and dirt. Let each coat dry completely before applying another. Finally, buff the collar with a clean cloth to restore its shine.
| Step | Product Needed | Purpose |
|---|---|---|
| 1. Condition | Leather conditioner | Moisturizes and softens |
| 2. Seal | Leather finish/sealant | Protects from moisture |
| 3. Dry | None | Allow coating to set |
| 4. Buff | Clean soft cloth | Enhances shine and smoothness |
Frequently Asked Questions
What Type of Leather Is Safest for Dogs With Allergies?
You should choose vegetable-tanned leather for dogs with allergies because it’s natural, free from harsh chemicals, and breathable. It’s gentler on sensitive skin, reducing irritation and making it safer for your furry friend’s comfort.
How Do I Clean and Maintain a Finished Leather Collar?
Think of your leather collar as a trusty steed—keep it clean by wiping with a damp cloth, condition it monthly with leather balm, and avoid soaking.
This’ll keep it soft, durable, and looking sharp for your dog’s adventures.
Can Leather Collars Be Used for Strong or Large Dog Breeds?
Yes, you can use leather collars for strong or large dog breeds, but make sure you select thick, high-quality leather and sturdy hardware.
Proper sizing and reinforcement will help guarantee durability and safety for your powerful pup.
Are Leather Collars Suitable for Puppies With Growing Necks?
Leather collars can suit puppies, but remember, their necks grow like wild vines.
You’ll want adjustable collars or ones you can replace often, ensuring comfort and safety without restricting their natural growth and playful energy.
How Long Does a Handmade Leather Collar Typically Last?
A handmade leather collar typically lasts several years if you take good care of it. You’ll want to clean and condition it regularly to keep the leather supple and prevent cracking or drying out over time.
Proper maintenance is key to extending its lifespan. Avoid exposing the collar to excessive moisture or direct sunlight, as these can damage the leather. With regular care, your leather collar can remain durable and attractive for a long time.
Conclusion
Now that you’ve crafted a sturdy, stylish leather collar for your dog, aren’t you proud of what you’ve made? With just a few simple steps, you’ve created something both practical and personal.
Remember, each collar you make is a unique expression of care and creativity. So, why settle for store-bought when you can design a perfect fit for your furry friend?
Keep experimenting, and enjoy the rewarding process of handmade craftsmanship. Making leather collars for dogs is not only fun but also allows you to tailor each piece to your pet’s needs.